Agaric, as a worker collective, does not have bosses and employees. We have skilled, hard-working teammates coming together to figure out and do ... everything.
We will make an exception to hire an excellent business director, project leader, attention-to-detail-and-the-big-picture person. If you happen to be a front end dev too, then great! If not, well, part of your role will be helping bring on more talent.
In addition to forging grand coalitions and leading amazing projects, we need help keeping track of invoices and payments and doing financial planning, managing people's skills and availability, and writing role descriptions way better than this one.
We want someone who expects within six months of joining us to have helped make things 300% more awesome. As a principal or a hired boss, part of this role will be making the decisions of what to prioritize, and saying no to potential projects that don't fit.
OK we'll just say it: We want someone to be Agaric's Liza Kindred.
Want to be part of something that's bigger than yourself, that works on projects and ideas bigger still?
Agaric's model is Free and Open: free and open standards, free and open work and management, free and open source code, free and open documentation. So be prepared to help us share everything we build, as a collective company and with code, to the Drupal community and beyond.
Agaric is not just about doing web work as a collective. We work on interesting, exciting projects (both client work for solid financial compensation and our own platform-building initiatives for dreams of riches). We then, also collectively, take some of the resources, skills, and connections we gain in this work to help build tools, networks, and open learning projects that change the world for the better. We see tremendous potential for a better world by helping people gain more control over their own lives, and open source free software is both a metaphor and a tool for how we can better lives.
We welcome serious and/or comical inquiries.
During a migration, Drupal reads the data from an external source and creates content in our new Drupal Site. While doing that, Drupal executes all hooks and events related to creating the new content. So any implementations of hook_entity_insert() are triggered for every new entity saved on our new site.
This can be a problem if we have some features in our new site which have an effect beyond the site and are executed when any new content is created, such as sending a tweet or sending an email. When we run the migration we will have a ton of emails or tweets from the old content. Usually, that is not the expected nor desired behavior.
Fortunately, in Drupal 8 the migrations are Events and we can create an EventSubscriber (more about EventSubscribers here) which will allow us to create a flag before the migration runs so we can determine in our code if the entity has been created during a migration or not.
The main idea was taken from this Moshe Weitzman gist. (Thanks!) I will add just the missing parts.
First, we generate all the event subscriber related files using this Drupal Console command:
drupal generate:event:subscriber
The console will ask some questions (in which module do we want to generate the EventSubscriber and the name of the service):
 Enter the module name [config_log]:
 > your_module

 Enter the service name [simple_faq.default]:
 > migration_events.subscriber

 Class name [DefaultSubscriber]:
 > MigrationEvents

 Enter event name [ ]:
 >

 Do you want to load services from the container (yes/no) [no]:
 > no

 Do you confirm generation? (yes/no) [yes]:
 >yes
This will generate two files:
modules/custom/your_module/your_module.services.yml
Which basically lets Drupal know that we have a Subscriber there which needs to be executed and:
modules/custom/your_module/src/EventSubscriber/MigrationEvents.php
With this content:
namespace Drupal\simple_faq\EventSubscriber;

use Symfony\Component\EventDispatcher\EventSubscriberInterface;
use Symfony\Component\EventDispatcher\Event;

/**
 * Class MigrationEvents.
 *
 * @package Drupal\simple_faq
 */
class MigrationEvents implements EventSubscriberInterface {

  /**
   * Constructs a new MigrationEvents object.
   */
  public function __construct() {

  }

  /**
   * {@inheritdoc}
   */
  static function getSubscribedEvents() {

    return $events;
  }

}
We need to add our flag in this file which will indicate to Drupal that we are running the migration. First, we need to import the Migrate events, at the top of our MigrationEvents.php file:
use Drupal\migrate\Event\MigrateImportEvent;
use Symfony\Component\EventDispatcher\EventSubscriberInterface;
use Drupal\migrate\Event\MigrateEvents;
And then after add our methods, within the MigrationEvents class:
   protected $staticCache;

  public function __construct() {
    $this->staticCache = &drupal_static("your_migration");
  }

  /**
   * {@inheritdoc}
   */
  public static function getSubscribedEvents() {
    return [
      MigrateEvents::PRE_IMPORT => 'onMigratePreImport',
      MigrateEvents::POST_IMPORT => 'onMigratePostImport',
    ];
  }

  /**
   * @param \Drupal\migrate\Event\MigrateImportEvent $event
   *   Import Event.
   */
  public function onMigratePostImport(MigrateImportEvent $event) {
    if ($event->getMigration()->getBaseId() == "your_migration") {
      $this->staticCache = FALSE;
    }
  }

  /**
   * @param \Drupal\migrate\Event\MigrateImportEvent $event
   *   Import Event.
   */
  public function onMigratePreImport(MigrateImportEvent $event) {
    if ($event->getMigration()->getBaseId() == "your_migration") {
      $this->staticCache = TRUE;
    }
  }
And that's it, now we have a flag which we can use to determine if we are running the migration or not, the complete class look like this:
namespace Drupal\your_module\EventSubscriber;

use Drupal\migrate\Event\MigrateImportEvent;
use Symfony\Component\EventDispatcher\EventSubscriberInterface;
use Drupal\migrate\Event\MigrateEvents;

/**
 * Event subscriber to avoid sending emails/tweets/facebook posts on migrations.
 */
class MigrationEvents implements EventSubscriberInterface {

  /**
   * The drupal_static cache.
   *
   * @var array
   */
  protected $staticCache;

  /**
   * CommentEventSubscriber constructor.
   */
  public function __construct() {
    $this->staticCache = &drupal_static("your_migration");
  }

  /**
   * {@inheritdoc}
   */
  public static function getSubscribedEvents() {
    return [
      MigrateEvents::PRE_IMPORT => 'onMigratePreImport',
      MigrateEvents::POST_IMPORT => 'onMigratePostImport',
    ];
  }

   /**
   * @param \Drupal\migrate\Event\MigrateImportEvent $event
   *   Import Event.
   */
  public function onMigratePostImport(MigrateImportEvent $event) {
    if ($event->getMigration()->getBaseId() == "your_migration") {
      $this->staticCache = FALSE;
    }
  }

  /**
   * @param \Drupal\migrate\Event\MigrateImportEvent $event
   *   Import Event.
   */
  public function onMigratePreImport(MigrateImportEvent $event) {
    if ($event->getMigration()->getBaseId() == "your_migration") {
      $this->staticCache = TRUE;
    }
  }
}
And finally, we now can use this variable to determine if we should send that email when creating a new entity, for instance:
/**
 * Implements hook_node_insert().
 */
function yourmodule_node_insert($entity) {
  // If the migration is running, just return without doing anything.
  if (drupal_static('your_migration', FALSE)) {
    return;
  }
  // All your code for sending emails/tweets is here.
  // . . .
}
And that's it.
Here we used drupal_static to preserve the value through the execution of the migration. If you want to read more about it, check here
Citations supporting specific points in Micky's talk
"Silicon Valley is solving the problems that 20-something's with money face" Should tech startups tackle bigger problems? Yes. #cyberposium — Emily @EmVVeis on 1 Nov 2014
On startups solving problems of wealthy, white, younger men:
- Most successful company founders come from wealthy backgrounds.
- Most (successful) VC-funded founders are under 35 at time of founding.
Other:
- Benjamin Mako Hill keynote LibrePlanet 2017 - How markets coopted free software's most powerful weapon (youtube link)
- Apple threatens to sue Louis Rossmann (youtube link)
- Eric Lundgren goes to jail
What else?
What are we missing? What would you add or change? Send us a note or tell us in the comments below!
In the previous post we talked about migration groups provided by the Migrate Plus module. Today, we are going to compare them to migration tags. Along the way, we are going to dive deeper into how they work and provide tips to avoid problems when working with them. Let’s get started.
What is the difference between migration tags and migration groups?
In the article on declaring migration dependencies we briefly touched on the topic of tags. Here is a summary of migration tags:
- They are a feature provided by the core Migrate API.
- Multiple tags can be assigned to a single migration.
- They are defined in the migration definition file alone and do not require creating a separate file.
- Both Migrate Tools and Migrate Run provide a flag to execute operations by tag.
- They do not allow you to share configuration among migrations tagged with the same value.
Here is a summary of migration groups:
- You need to install the Migrate Plus module to take advantage of them.
- Only one group can be assigned to any migration.
- You need to create a separate file to declare group. This affects the readability of migrations as their configuration will be spread over two files.
- Only the Migrate Tools provides a flag to execute operations by group.
- They offer the possibility to share configuration among members of the same group.
- Any shared configuration could be overridden in the individual migration definition files.
What do migration tags and groups have in common?
The ability to put together multiple migrations under a single name. This name can be used to import or rollback all the associated migrations in one operation. This is true for the migrate:import and migrate:rollback Drush commands provided by Migrate Plus. What you have to do is use the --group or --tag flags, respectively. The following snipped shows an example of importing and rolling back the migrations by group and tag:
$ drush migrate:import --tag='UD Config Group (JSON Source)'
$ drush migrate:rollback --tag='UD Config Group (JSON Source)'

$ drush migrate:import --group='udm_config_group_json_source'
$ drush migrate:rollback --group='udm_config_group_json_source'Note: You might get errors indicating that the "--tag" or "--group" options do not accept a value. See this issue if you experience that problem.
Neither migration tags nor groups replace migration dependencies. If there are explicit migration dependencies among the members of a tag or group, the Migrate API will determine the order in which the migrations need to be executed. But if no dependencies are explicitly set, there is no guarantee the migrations will be executed in any particular order. Keep this in mind if you have separate migrations for entities that you later use to populate entity reference fields. Also note that migration dependencies are only executed automatically for import operations. Dependent migrations will not be rolled back automatically if the main migration is rolled back individually.
Can groups only be used for migrations defined as configuration entities?
Technically speaking, no. It is possible to use groups for migrations defined as code. Notwithstanding, migration groups can only be created as configuration entities. You would have to rebuild caches and sync configuration for changes in the migrations and groups to take effect, respectively. This is error prone and can lead to hard to debug issues.
Also, things might get confusing when executing migrations. The user interface provided by Migrate Plus works exclusively with migrations defined as configuration entities. The Drush commands provided by the same module work for both types of migrations: code and configuration. The default and null values for the migration_group key are handled a bit different between the user interface and the Drush commands. Moreover, the ability to execute operations per group using Drush commands is provided only by the Migrate Tools module. The Migrate Run module lacks this functionality.
Managing migrations as code or configuration should be a decision to take at the start of the project. If you want to use migration groups, or some of the other benefits provided by migrations defined as configuration, stick to them since the very beginning. It is possible to change at any point and the transition is straightforward. But it should be avoided if possible. In any case, try not to mix both workflows in a single project.
Tip: It is recommended to read this article to learn more about the difference between managing migrations as code or configuration.
Setting migration tags inside migration groups
As seen in this article, it is possible to use set migration tags as part of the shared configuration of a group. If you do this, it is not recommended to override the migration_tags key in individual migrations. The end result might not be what you expect. Consider the following snippets as example:
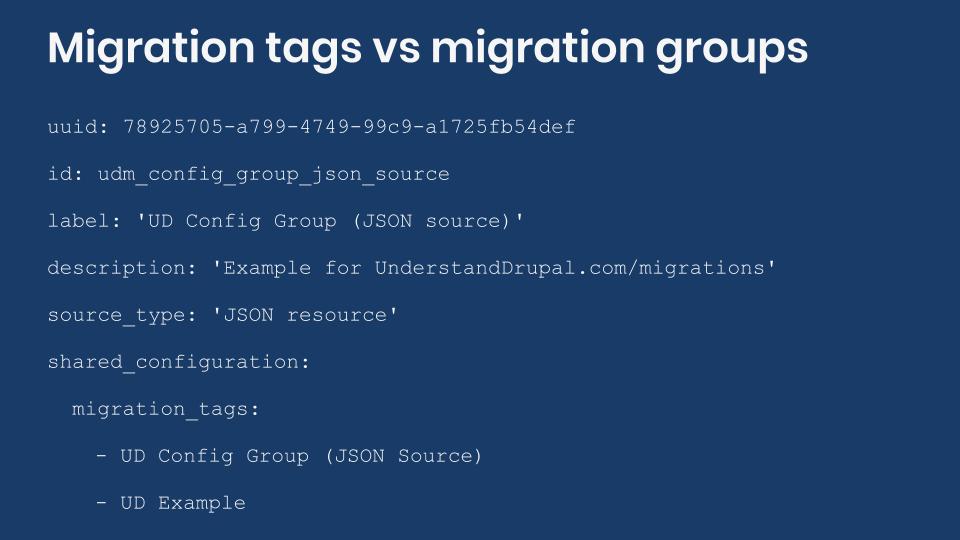
# Migration group configuration entity definition.
# File: migrate_plus.migration_group.udm_config_group_json_source.yml
uuid: 78925705-a799-4749-99c9-a1725fb54def
id: udm_config_group_json_source
label: 'UD Config Group (JSON source)'
description: 'A container for migrations about individuals and their favorite books. Learn more at https://understanddrupal.com/migrations.'
source_type: 'JSON resource'
  migration_tags:
    - UD Config Group (JSON Source)
    - UD Example
# Migration configuration entity definition.
# File: migrate_plus.migration.udm_config_group_json_source_node.yml
uuid: def749e5-3ad7-480f-ba4d-9c7e17e3d789
id: udm_config_group_json_source_node
label: 'UD configuration host node migration for migration group example (JSON source)'
migration_tags:
  - UD Lorem Ipsum
migration_group: udm_config_group_json_source
source: ...
process: ...
destination: ...
migration_dependencies: ...
The group configuration declares two tags: UD Config Group (JSON Source) and UD Example. The migration configuration overrides the tags to a single value UD Lorem Ipsum. What would you expect the final value for the migration_tags key be? Is it a combination of the three tags? Is it only the one key defined in the migration configuration?
The answer in this case is not very intuitive. The final migration will have two tags: UD Lorem Ipsum and UD Example. This has to do with how Migrate Plus merges the configuration from the group into the individual migrations. It uses the array_replace_recursive() PHP function which performs the merge operation based on array keys. In this example, UD Config Group (JSON Source) and UD Lorem Ipsum have the same index in the migration_tags array. Therefore, only one value is preserved in the final result.
The examples uses the migration_tags key as it is the subject of this article, but the same applies to any nested structure. Some configurations are more critical to a migration than a tag or group. Debugging a problem like this can be tricky. But the same applies to any configuration that has a nested structure. If the end result might be ambiguous, it is preferred to avoid the situation in the first place. In general, nested structures should only be set in either the group or the migration definition file, but not both. Additionally, all the recommendations for writing migrations presented in this article also apply here.
What did you learn in today’s blog post? Did you know the difference between migration tags and groups? Share your answers in the comments. Also, I would be grateful if you shared this blog post with others.
Next: Executing Drupal migrations from the user interface with Migrate Tools
This blog post series, cross-posted at UnderstandDrupal.com as well as here on Agaric.coop, is made possible thanks to these generous sponsors. Contact Understand Drupal if your organization would like to support this documentation project, whether it is the migration series or other topics.
Overview
This training is for people who want to get a solid foundation in Drupal site building. No Drupal experience is required!
With hands-on, guided exercises from start to finish, attendees will have the opportunity to get comfortable with Drupal's administration interface, and build a simple, fully functional website.
You will learn how different concepts relate to each other: nodes, content types, fields, views, users, blocks, taxonomy terms, and menus. By the end of the training, you will be able to identify the different building blocks of a Drupal site and know where to look when modifications are needed.
Request a Private Training

Veronica Lyons, a longtime family friend who took on the important work of spoiling myself and my brothers, and a short-time project manager for Agaric who took on the important work of disciplining me to focus and accomplish, died this Sunday following a paralyzing stroke.
A friend of my mother's since our families lived in the same apartment building in Framingham when my older brother and Veronica's only daughter were young, Veronica learned computers when the time was right and launched herself into a highly-paid career while raising her daughter alone. Always generous with her time and money, Veronica took us on trips to Canobie Lake Park, gave us many more gifts than we deserved, and always offered to take us in if our parents threw us out, or if we just wanted out. Indeed, my older brother stayed with her for a time, albeit not exactly under those circumstances. I can only imagine the impact Veronica had on her biological nieces and nephews, and I know she took in a troubled teen for a while.
In 2009 and 2010, between jobs in her career, which then focused on enterprise resource management, Veronica worked as a project manager for this small web development cooperative. Veronica chaperoned my completion of a Harvard University brain science web site— literally. She drove me in to Cambridge many days through the grind of completing that project; two people from that Harvard office have brought Agaric significant business in the years since. A life-long learner, Veronica came to Boston Drupal meetups (driving me in to those also) and dabbled in making web sites herself.
Veronica remained a relationship rock as she recovered from previous strokes, always boosting those she loved. She always took the side of the younger generation, but didn't hesitate to tell us when, on rare occasions, she judged our mother to be right. Of course, it's my nephews who most recently received her generous benefit of the doubt and presents.
Veronica, everyone who knew you is immeasurably better off because of your kindness. You deserved better. I will miss you, and forever owe you another visit.
Veronica Margaret Lyons, July 4, 1955 to March 25, 2018
(This image is cropped from a larger one by the official photographer at my younger brother's wedding, as Veronica was truly part of my family. In it is Jakob Melançon, myself, Eva (bride) and Dan (groom) Melançon, Veronica, and my father John Melançon.)
Sign up to be notified when Agaric gives a migration training:
On Tuesday, July 7, Agaric will host 3 free online webinars about Drupal 9. We invite the community to join us to learn more about the latest version of our favorite CMS. We will leave time at the end of each presentation for questions from the audience. All webinars will be presented online via Zoom. Fill out the form at the end of the post to reserve your seat. We look forward to seeing you.
Getting started Drupal 9
Time: 10:00 AM - 11:00 AM Eastern Time (EDT)
This webinar will cover basic site building concepts. You will learn what is a node and how they differ from content types. We are going to explain why fields are so useful for structuring your site's content and the benefits of doing this. We will cover how to use Views to create listing of content. Layout builder, blocks, taxonomies, and the user permissions system will also be explained.
Introduction to Drupal 9 migrations
Time: 11:30 AM - 12:30 AM Eastern Time (EDT)
This webinar will present an overview of the Drupal migrations system. You will learn about how the Migrate API works and what assumptions it makes. We will explain the syntax to write migrations how different source, process, and destinations plugins work. Recommended migration workflows and debugging tips will also be presented. No previous experience with the Migrate API nor PHP is required to attend.
Drupal 9 upgrades: how and when to move your Drupal 7 sites?
Time: 1:00 PM - 2:00 PM Eastern Time (EDT)
This webinar will present different tools and workflows to upgrade your Drupal 7 site to Drupal 9. We will run through what things to consider when planning an upgrade. This will include how to make site architecture changes, modules that do not have D9 counterparts, what to do when there are no automated upgrade paths.
Below are the slides used during the webinars:


Find It Cambridge
Opportunities for those who live, work and play in Cambridge
Drupal 8 migrations quickstart guide (half day training)
DrupalCon Nashville
Learning objectives:
- Understand the different approaches to upgrading your site to Drupal 8 using the Migrate API.
- Revise site architecture and map configuration from previous site to the new one (content types, fields, etc).
- Learn how to migrate data from modules that do not offer automated migrations.
- Learn how to migrate data into media entities and paragraphs.
This is an advanced course. You should be familiar with source, process, and destination plugins; how the process pipeline operates; and how to execute migrations from the command line via Drush. Understanding the migrations in this demo repo suffices to take this training. Note that the repo mentioned before is not the one we will be covering with the training. You can also have a look at this video for an overview of the Migrate API.
Original Post
The struggle to take seriously the impact of racism on public health during the covid-19 crisis spotlights the importance of health communities of practice and their need to have high-quality, data-driven discussions.
Environmental racism was forced into the national conversation by Flint, Michigan years ago and COVID-19 has made long-standing problems of racism in healthcare provision impossible to ignore. The rebellion against police repression, which started in Minneapolis, is itself a reaction to the public health issues caused by policing. This reaction was predictable, and Minneapolis resident D.A. Bullock, indeed, predicted it.
So, moving forward...
How do we have data-informed conversations effectively within our communities?
How do we expand them to include more health professionals and community members from outside of what is currently recognized as the healthcare industry?
We need resolute answers to both of these questions.
Thanks to a client giving us a shout out, Agaric has come to acknowledge our experience building for health communities and the role that we are able to take in this conversation. We would love to talk and learn with others more deeply about these issues. We're hosting a "Birds of a Feather" (people interested in the same topic coming together) at DrupalCon Global today at 3:15 Eastern Time to talk about facilitating discussion among healthcare practitioners, researchers, and the public.
Here are some more questions to get you thinking!
What are the next steps for healthcare workers and researchers? What are the next steps for any person who cares about our communities? How do we move important conversations into the public realm sustainably? The stakes for both well-informed and broad-based discussion are clearer than ever. We know pressure, policy, and practice are what make change; what is our role?
Please leave your comments even if you can't join us today!
Portside is a digital media outlet that publishes and curates articles and videos of interest to the left. This curation lifts up critical voices in an age of media saturation and facilitates thoughtful, bold dialog online.
Cross-posted from opensource.com.
Install and configure the tools
Since it is good practice to use Composer to manage a Drupal site's dependencies, use it to install the tools for BDD tests: Behat, Mink, and the Behat Drupal Extension. The Behat Drupal Extension lists Behat and Mink among its dependencies, so you can get all of the tools by installing the Behat Drupal Extension package:
composer require drupal/drupal-extension --dev
Mink allows you to write tests in a human-readable format. For example:
Given I am registered user,
When I visit the homepage,
Then I should see a personalized news feed
Because these tests are supposed to emulate user interaction, you can assume they will be executed within a web browser. That is where Mink comes into play. There are various browser emulators, such as Goutte and Selenium, and they all behave differently and have very different APIs. Mink allows you to write a test once and execute it in different browser emulators. In layman's terms, Mink allows you to control a browser programmatically to emulate a user's action.
Now that you have the tools installed, you should have a behat command available. If you run it:
./vendor/bin/behatyou should get an error, like:
FeatureContext context class not found and can not be usedStart by initializing Behat:
./vendor/bin/behat --initThis will create two folders and one file, which we will revisit later; for now, running behat without the extra parameters should not yield an error. Instead, you should see an output similar to this:
No scenarios
No steps
0m0.00s (7.70Mb)
Now you are ready to write your first test, for example, to verify that website visitors can leave a message using the site-wide contact form.
Writing test scenarios
By default, Behat will look for files in the features folder that's created when the project is initialized. The file inside that folder should have the .feature extension. Let's tests the site-wide contact form. Create a file contact-form.feature in the features folder with the following content:
Feature: Contact form
  In order to send a message to the site administrators
  As a visitor
  I should be able to use the site-wide contact form

  Scenario: A visitor can use the site-wide contact form
    Given I am at "contact/feedback"
    When I fill in "name" with "John Doe"
    And I fill in "mail" with "john@doe.com"
    And I fill in "subject" with "Hello world"
    And I fill in "message" with "Lorem Ipsum"
    And I press "Send message"
    Then I should see the text "Your message has been sent."
Behat tests are written in Gherkin, a human-readable format that follows the Context–Action–Outcome pattern. It consists of several special keywords that, when parsed, will execute commands to emulate a user's interaction with the website.
The sentences that start with the keywords Given, When, and Then indicate the Context, Action, and Outcome, respectively. They are called Steps and they should be written from the perspective of the user performing the action. Behat will read them and execute the corresponding Step Definitions. (More on this later.)
This example instructs the browser to visit a page under the "contact/feedback" link, fill in some field values, press a button, and check whether a message is present on the page to verify that the action worked. Run the test; your output should look similar to this:
1 scenario (1 undefined)
7 steps (7 undefined)
0m0.01s (8.01Mb)

 >> default suite has undefined steps. Please choose the context to generate snippets:

  [0] None
  [1] FeatureContext
 >
Type 0 at the prompt to select the None option. This verifies that Behat found the test and tried to execute it, but it is complaining about undefined steps. These are the Step Definitions, PHP code that will execute the tasks required to fulfill the step. You can check which steps definitions are available by running:
./vendor/bin/behat -dlCurrently there are no step definitions, so you shouldn't see any output. You could write your own, but for now, you can use some provided by the Mink extension and the Behat Drupal Extension. Create a behat.yml file at the same level as the Features folder—not inside it—with the following contents:
default:
  suites:
    default:
      contexts:
       - FeatureContext
        - Drupal\DrupalExtension\Context\DrupalContext
        - Drupal\DrupalExtension\Context\MinkContext
        - Drupal\DrupalExtension\Context\MessageContext
        - Drupal\DrupalExtension\Context\DrushContext
  extensions:
    Behat\MinkExtension:
      goutte: ~
Steps definitions are provided through Contexts. When you initialized Behat, it created a FeatureContext without any step definitions. In the example above, we are updating the configuration file to include this empty context along with others provided by the Drupal Behat Extension. Running ./vendor/bin/behat -dl again produces a list of 120+ steps you can use; here is a trimmed version of the output:
default | Given I am an anonymous user
default | When I visit :path
default | When I click :link
default | Then I (should )see the text :text
Now you can perform lots of actions. Run the tests again with ./vendor/bin/behat. The test should fail with an error similar to:
  Scenario: A visitor can use the site-wide contact form        # features/contact-form.feature:8
        And I am at "contact/feedback"                          # Drupal\DrupalExtension\Context\MinkContext::assertAtPath()
        When I fill in "name" with "John Doe"                   # Drupal\DrupalExtension\Context\MinkContext::fillField()
        And I fill in "mail" with "john@doe.com"                # Drupal\DrupalExtension\Context\MinkContext::fillField()
        And I fill in "subject" with "Hello world"              # Drupal\DrupalExtension\Context\MinkContext::fillField()
        Form field with id|name|label|value|placeholder "subject" not found. (Behat\Mink\Exception\ElementNotFoundException)

        And I fill in "message" with "Lorem Ipsum"              # Drupal\DrupalExtension\Context\MinkContext::fillField()

        And I press "Send message"                              # Drupal\DrupalExtension\Context\MinkContext::pressButton()

        Then I should see the text "Your message has been sent." # Drupal\DrupalExtension\Context\MinkContext::assertTextVisible()

 --- Failed scenarios:

        features/contact-form.feature:8 1 scenario (1 failed) 7 steps (3 passed, 1 failed, 3 skipped) 0m0.10s (12.84Mb)
The output shows that the first three steps—visiting the contact page and filling in the name and subject fields—worked. But the test fails when the user tries to enter the subject, then it skips the rest of the steps. These steps require you to use the name attribute of the HTML tag that renders the form field.
When I created the test, I purposely used the proper values for the name and address fields so they would pass. When in doubt, use your browser's developer tools to inspect the source code and find the proper values you should use. By doing this, I found I should use subject[0][value] for the subject and message[0][value] for the message. When I update my test to use those values and run it again, it should pass with flying colors and produce an output similar to:
1 scenario (1 passed)
7 steps (7 passed)
0m0.29s (12.88Mb)
Success! The test passes! In case you are wondering, I'm using the Goutte browser. It is a command line browser, and the driver to use it with Behat is installed as a dependency of the Behat Drupal Extension package.
Other things to note
As mentioned above, BDD tests should be written from the perspective of the user performing the action. Users don't think in terms of HTML name attributes. That is why writing tests using subject[0][value] and message[0][value] is both cryptic and not very user friendly. You can improve this by creating custom steps at features/bootstrap/FeatureContext.php, which was generated when Behat initialized.
Also, if you run the test several times, you will find that it starts failing. This is because Drupal, by default, imposes a limit of five submissions per hour. Each time you run the test, it's like a real user is performing the action. Once the limit is reached, you'll get an error on the Drupal interface. The test fails because the expected success message is missing.
This illustrates the importance of debugging your tests. There are some steps that can help with this, like Then print last drush output and Then I break. Better yet is using a real debugger, like Xdebug. You can also install other packages that provide more step definitions specifically for debugging purposes, like Behatch and Nuvole's extension,. For example, you can configure Behat to take a screenshot of the state of the browser when a test fails (if this capability is provided by the driver you're using).
Regarding drivers and browser emulators, Goutte doesn't support JavaScript. If a feature depends on JavaScript, you can test it by using the Selenium2Driver in combination with Geckodriver and Firefox. Every driver and browser has different features and capabilities. For example, the Goutte driver provides access to the response's HTTP status code, but the Selenium2Driver doesn't. (You can read more about drivers in Mink and Behat.) For Behat to pickup a javascript enabled driver/browser you need to annotate the scenario using the @javascript tag. Example:
Feature:
 (feature description)

  @javascript
  Scenario: An editor can select the author of a node from an autocomplete field
    (list of steps)
Another tag that is useful for Drupal sites is @api. This instructs the Behat Drupal Extension to use a driver that can perform operations specific to Drupal; for example, creating users and nodes for your tests. Although you could follow the registration process to create a user and assign roles, it is easier to simply use a step like Given I am logged in as a user with the "Authenticated user" role. For this to work, you need to specify whether you want to use the Drupal or Drush driver. Make sure to update your behat.yml file accordingly. For example, to use the Drupal driver:
default:
  extensions:
    Drupal\DrupalExtension:
      blackbox: ~
      api_driver: drupal
      drupal:
        drupal_root: ./relative/path/to/drupal
I hope this introduction to BDD testing in Drupal serves you well. If you have questions, feel free to add a comment below, send me an email at mauricio@agaric.com (or through the Agaric contact form) or a tweet at @dinarcon.
The .org domain conveys a nonprofit status to most of us, differentiated from the for-profit connotations of .com (or the emphatically for-profit .biz). However, the nonprofit nature of the TLD was lost as of November 13th. The private equity firm Ethos Capital bought Public Interest Registry, the nonprofit that managed .org. In other words, a nonprofit TLD is now run by a for-profit investment firm.
The adherence to nonprofit values was already loose with .org. A group didn't have to prove in any way it was a nonprofit or community organization. Still, it was run by a nonprofit that describes themselves this way-
"Acting in the public interest. As our name implies, PIR serves the public interest online. Our globally diverse team is committed to providing a stable online platform to enable people to do good things."
Internet Society, the nonprofit that created PIR, defends the sale by basically stating that the money they're getting will help them do their work better.
However, private acquisition of nonprofit entities inherently changes the structure and ultimate goals of a group. It's almost certain this means an eventual increase in prices for .org domains - a logical move for a firm that needs to increase its profit margins. What else could this mean for the .org community? Perhaps the already loose definition of who .org is intended for will be relaxed further to expand the market.
A better model would be a platform cooperative, in which the purchasers of .org domains become members of the cooperative. A cooperative is bound to its stakeholders, ensuring on a structural level that the .org domain really is managed to provide "a stable online platform to enable people to do good things."
Whatever the real world implications of this move, one thing is clear- in a time when the internet as a public good needs to be treated, owned and governed as such, this privatization of our movement's tools is a disturbing event in a larger troubling trend.
