Ben and Micky spoke at DrupalCon Seattle 2019 and New England Drupal Camp 2019 about scaling community conversations and decision-making. Rather than having slides of fine print and links, we're posting resources here in this blog post.
Here's a short-enough-to-write-on-a-business-card link for this page – agaric.coop/scaling-community – for easier sharing these resources with others.
350.org is a global climate justice organization that helped organize the largest climate strike in history. Together we improved their Climate Justice Action Map (CJAM) in the lead up to the strike so that activists could better mobilize their communities.
Punctuating Lists
If an article has multiple authors (using a user reference field or a content reference field), Drupal core displays each on their own line.
Like this ugly, rigid presentation:
Notas:
Diapositivas - https://github.com/fiqus/FIT-talk-en
## FACTTIC - Federación Argentina de Cooperativas de Trabajo de Tecnología, Innovación y Conocimiento
* Lista de correo sólo para miembros
* Mattermost (chat de código abierto)
* Reunión mensual de la junta virtual (cualquier miembro puede asistir)
* Reuniones anuales cara a cara
## FIT
* Un proyecto dentro de FACTTIC donde las cooperativas comparten el estado de los proyectos en los que están trabajando
* Evolucionado a un área donde las cooperativas comparten proyectos
* Para unirse a la FIT, tienes que ser un miembro FACTTIC
* Reuniones virtuales mensuales
* Canal Mattermost para el diálogo en curso
* Las cooperativas tienen diferentes habilidades/servicios, pero cuando hay superposición, trata de no competir entre sí y determina las "necesidades" de cada cooperativa.
### Escenario 1: El proyecto demanda más trabajadores de los que tiene la cooperativa
* Cuando hay una necesidad de ayuda, el proyecto se comparte en FIT
* Las cooperativas pueden solicitar unirse al proyecto
* Los candidatos son evaluados y uno es elegido
* El cliente es informado y debe estar de acuerdo
* La coordinación del proyecto está dirigida por la cooperativa inicial
* El acuerdo comercial es manejado sólo por la cooperativa inicial
### Escenario 2: El cliente necesita que se haga el trabajo, pero Coop decide no tomarlo
* Esto podría suceder porque la cooperativa inicial no tiene los recursos o declina por una razón estratégica
* El proyecto se comparte con la FIT
* Si no hay cooperativas interesadas, se le dice al cliente que no hay nadie disponible.
* Si una cooperativa está interesada, el contacto de esa cooperativa se comparte con el cliente.
* Si más de una cooperativa está interesada, entonces preguntamos, ¿este proyecto requiere más de un trabajador?
* Si sólo necesita un trabajador, entonces la cooperativa que más lo necesita lo recibe.
* Si requiere más de un trabajador, entonces las cooperativas se coordinan entre sí para completar el trabajo.
## Case Studies
### Betterez
* Cliente canadiense
* Plataforma de gestión de reservas y billetes
* Tecnologías: MongoDB, NodeJS, VueJS y Elixir
* Necesitaba más trabajo del que Fiqus podía proporcionar
* 30 desarrolladores con 7 cooperativas diferentes
* Fiqus maneja las cuestiones financieras como las diferentes tarifas de los diferentes servicios
### Receptivi
* Cliente canadiense
* La página web muestra en tiempo real las percepciones psicológicas del personal
* Tenía más trabajo, pero Fiqus se negó a asumir el trabajo
* El trabajo se compartió en la FIT
* 3 desarrolladores de 2 cooperativas
### Mall Plaza
* Cliente chileno
* Aplicación móvil que muestra los servicios del centro comercial
*Técnica: Reaccionar Nativo, PostgreSQL, Frasco
## Onapsis
* Cliente argentino
* Sistema web que muestra alertas de vulnerabilidad en los servidores
* 2 cooperativas
## FIT Internacional
* Queremos replicar este modelo a nivel internacional.
1. Compartir este modelo con otros a fin de mejorarlo y difundir la conciencia
* Presentando en el Show and Tell
2. Construir relaciones de confianza
3. Conocerse en persona, pasar tiempo juntos
* Viajando al Reino Unido, reunión con la federación, COTECH
* Compartir experiencias después del viaje
## Preguntas y respuestas:
P: ¿Alguna vez ha tenido la resistencia de un cliente al entregar el trabajo a otra cooperativa?
R: Hay veces que los clientes no entienden las cooperativas y la cooperación entre ellas. Explicamos el beneficio y compartimos estudios de casos. Si hay una fecha límite que debe cumplirse, es más rápido traer un equipo con experiencia previa trabajando con la empresa original que tratar de encontrar una empresa completamente diferente.
P: ¿Cuánto comparten acerca de las múltiples cooperativas que trabajan en un proyecto?
R: Si son sólo unas pocas horas, no vale la pena hablar de ello. Sin embargo, la mayoría de las veces es importante compartir esa información y usarla como una oportunidad educativa para demostrar la fuerza de las cooperativas trabajando juntas.
* Una vez que los clientes ven el resultado de la cooperación se dan cuenta de que es una buena manera de enfocar el trabajo.
* La simplicidad del proceso es hermosa.
P: ¿Cómo se comparten los costos de desarrollo de los negocios?
R: La cooperativa que comparte el proyecto puede bajar sus tarifas durante el proceso de aceleración.
* Este es un aspecto que podría mejorarse.
* Lo más importante es ser transparente y comunicar mucho.
* Mantener el espíritu de generosidad fluyendo.
* Cuando la cooperación es exitosa, se construye la confianza con el cliente.
* Usar una herramienta para analizar los presupuestos y el progreso de los proyectos y prever la disponibilidad.
* La cooperación también asegura la calidad, los trabajadores de confianza se unirán al proyecto.
As big tech continues to violate our privacy, thwart worker power, collude with militaries and deportation agencies, we need to move to ethical tech tools we can trust.
However, it can be intimidating to make the switch to new, unfamiliar tools.
Micky is leading two workshops to help people make the switch.
“How to Switch to Free Software: Email” 4:45-6:45pm Wednesday, December 4
Micky Metts of Boston’s Agaric Tech Cooperative will help us get out of the fix. The key to regaining security and control of the internet is switching to free software equivalents to proprietary/corporate software for communicating – among many uses.
This first workshop focuses on communications using email and texting software. The moderate inconvenience of switching is worth the privacy of strong encryption and the freedom of a new world of user-controlled communications and organizing. This first workshop in Sala Quetzal focuses on email and texting with encrypted software under user control. Bring your phone.
“How to Switch to Free Software: Browsers Etc” 2-4pm Thursday, December 5
A professional software developer, Micky, will focus on this second workshop, also in Sala Quetzal, on browsing, searching, and virtual meeting software. She will show how free software opens up the world of “platform co-ops” – think of Uber under drivers’ control and AirBnB under homeowners’ control.
Micky will be assisted by at-the-elbow translator/helpers. Bring your laptop and your phone.

Upgrade from Drupal 6 or 7 when it is right for you
In the era of modern Drupal, release cycles of major versions have only minor importance
Get notified of trainings
Learn when we have new opportunities for learning (two to four announcements a year).
Servicios federados / P2P / descentralizados.
https://redecentralize.org
https://prism-break.org/en/all/
https://secushare.org/comparison
Proyectos:
https://p2pfoundation.net/ https://gnunet.org/en/
https://tox.chat/about.html
https://net2o.de
https://ipfs.io https://github.com/cjdelisle/cjdns
IV. Movements and Networks
Free Software Movement
Free/Libre software is software that asserts the 4 fundamental software freedoms to every user. From Drupal modules to entire platforms, everything we build is Free Software because we believe that individuals and communities alike should have as much ownership as possible over the software they use. We even advise our clients in our blog on how to perform daily business operations using Free Software. Agaric's are members and supporters of the Free Software Foundation.
Design Justice Network
We design sites according to the principles of Design Justice. This means that the user experience of marginalized individuals is central to our design considerations. As a part of this network we share ideas and learn techniques to provide equitable online experiences for all. You may not know what it is like to be left out, until you are.
MayFirst Movement Technology
MayFirst Movement Technology (MFMT) is a cooperative, of movement organizations and activists, that provides web hosting, email services and other free software tools to its members. MFMT has a bold and progressive mission and agrees not turn over your data to third parties under any circumstances.
As members of MFMT, we support the organization by raising awareness on ethical hosting and free software community standards. We encourage people and organizations to join and host their websites through MFMT and gain access to a suite of free software tools and services. Micky is an active board member, involved in discussions of governance as well as the free software tools and platforms that MayFirst offers. Your web hosting does matter, and so does your voice!
Platform Cooperativism
The Platform Cooperativism Movement was started at the New School in NYC by Trebor Scholz and Nathan Schneider a professor at the University of Colorado. While Free Software spreads ownership of a software via licensing, Platform Cooperativism does so by founding platforms built by communities with democratic decision-making and shared ownership.
Micky has spoken at many Platform Cooperative events on Free Software, digital privacy and security, and the importance of collaborative development. She is also the author of a chapter in the book Ours to Hack and to Own: The Rise of Platform Cooperativism, A New Vision for the Future of Work and a Fairer Internet.
US Federation of Worker-Owned Cooperatives
USFWC is a non-profit 501c3 that is active in supporting worker-owned cooperatives while building the solidarity economy together. Currently we are building deeper ties with other tech coops within the USFWC to help advance economic justice in the tech industry as we build technology and support social justice movements, enhance trust and work with them. The federation works closely with DAWI - Democracy at Work Institute to educate and support members having a voice in their workplace.
U.S. Solidarity Economy Network
The USSEN is dedicated to exploring equitable and ethical economies that benefit community members and can interact on a larger scale to define methods and processes for promoting the growth and sustainability of each community as it relates to the world around it. As an organization, we are a member of the North American chapter of RIPESS which is part of an international organization that is an umbrella for groups like USSEN, worldwide. We also create Resist and Build workshops that support the Solidarity movement.
Tech Coop Network

The Tech Coop Network was formed at a USFWC conference in Los Angeles in 2017 by members of several worker-owned tech and web development cooperatives. We are currently discussing bylaws and governance to prepare for inviting other cooperatives to join us. We meet monthly and are establishing our communications infrastructure.
International Workers of the World
Some Agaric members have joined the Boston Chapter of the IWW. This chapter has a horrible and ignoble past that the current members are determined to overcome. Current members are committed to rebuilding this branch to exemplify the very causes it was based upon before it was destroyed from within. We stand with marginalized people and communities. We represent the disenfranchised worker and support non-conforming individuals rights. An injury to one is an injury to all!
The Digital Fourth
As members of the Boston Chapter, we stay informed on new laws and changes to current laws that could effect our online presence as well as our real life freedoms. Agaric enjoys keeping up with the digital legal strategies and will voice our opinion on whether digital citizens will be affected negatively or positively by pending legislation in our state and sometimes nationally. Artificial intelligence and machine learning are two complex areas of technology and they need to be addressed by groups like us, with diverse knowledge. Surveillance by the Government is also a priority and we publish our findings and recommendations. We cannot change the things that we do not know about. D4th is a part of the nationwide coalition Restore The Fourth.
Science for the People
Scientists and citizens convene to discuss and create ways for the general population to get involved in all things scientific. We believe that you should not need a degree to have access to people in fields of scientific study. We work to remove barriers and make connections between scientists and average citizens people with good ideas and questions that could benefit scientific understanding. Agaric is very interested in connecting people, projects and promoting discussions in this group. Science for the People has online meetings and is open to all.
Somos una cooperativa que se especializa en construir herramientas y sitios web que respetan la libertad. También impartimos capacitaciones and consultoria para que puedas alcanzar tus metas. Todo lo que hacemos es parte de nuestro proposito de ayudar a toda la gente a obtener la mayor cantidad de poder posible sobre sus propias vidas.
Desde nuestra fundación en 2006, nuestro método ha sido la de comprometernos profundamente con las necesidades de nuestros clientes y colaborar con las comunidades de software Libre para crear soluciones solidas y sostenibles.
Al construir herramientas abiertas y libres de usar y adaptar protegemos la web abierta y expandimos el uso del software mientras cumplimos con las necesidades unicas de las personas.
Hemos construido desde plataformas digitales de publiciación hasta espacios digitales de colaboración y directorios comunitarios de recursos. Nuestro mejor trabajo es cuando nos aseguramos de que el mundo puede ver el gran trabajo de una organización.
Siempre que es posible, contribuimos nuestro trabajo a la comunidad de software libre para empoderar a otros y que se beneficien de las soluciones que creamos. Mantenemos mas de 50 proyectos para que cualquiera pueda usar o contribuir.
Por favor lee mas acerca de nuestras habilidades y servicios.
También somos lideres en movimientos de desarrollo de tecnología ética para movimientos sociales. Nuestros miembros son parte del equipo de lideres de MayFirst/PeopleLink y del comite de planeación del DrupalCon. Somos miebros de la United States Federation of Worker Cooperatives, de la Free Software Foundation y de la Drupal Association. Finalmente, somos orgullosos miembros de la Industrial Workers of the World.

As it was for much of the world, 2018 was a combination of extremes for Agaric and the free and open web. Happily, we expanded our team, launched new sites, and empowered our clients through libre software. Unhappily, many of us and our communities endured health issues, political instability, and the effects of climate change.
For the open web, we disappointedly saw the United States officially end Net Neutrality while we excitedly watched the European Union begin enforcing comprehensive privacy laws with its General Data Protection Regulation. We were disgusted by tech giants like Facebook and Palantir diverting and deflecting from the abuses they carry out, but we were also inspired by workers at companies like Amazon and Google forcing their bosses to do better.
In looking back, we celebrate the victories and learn from the challenges—with our eyes set on serving our clients better, expanding the open web, and building an economy based on solidarity rather than exploitation.
To that end, here are the highlights of our work from last year and our intentions for the new year.
We have already covered two of many ways to migrate images into Drupal. One example allows you to set the image subfields manually. The other example uses a process plugin that accomplishes the same result using plugin configuration options. Although valid ways to migrate images, these approaches have an important limitation. The files and images are not removed from the system upon rollback. In the previous blog post, we talked further about this topic. Today, we are going to perform an image migration that will clear after itself when it is rolled back. Note that in Drupal images are a special case of files. Even though the example will migrate images, the same approach can be used to import any type of file. This migration will also serve as the basis for explaining migration dependencies in the next blog post.
File entity migrate destination
All the examples so far have been about creating nodes. The migrate API is a full ETL framework able to write to different destinations. In the case of Drupal, the target can be other content entities like files, users, taxonomy terms, comments, etc. Writing to content entities is straightforward. For example, to migrate into files, the process section is configured like this:
destination:
  plugin: 'entity:file'
You use a plugin whose name is entity: followed by the machine name of your target entity. In this case file. Other possible values are user, taxonomy_term, and comment. Remember that each migration definition file can only write to one destination.
Source section definition
The source of a migration is independent of its destination. The following code snippet shows the source definition for the image migration example:
source:
  constants:
    SOURCE_DOMAIN: 'https://agaric.coop'
    DRUPAL_FILE_DIRECTORY: 'public://portrait/'
  plugin: embedded_data
  data_rows:
    - photo_id: 'P01'
      photo_url: 'sites/default/files/2018-12/micky-cropped.jpg'
    - photo_id: 'P02'
      photo_url: ''
    - photo_id: 'P03'
      photo_url: 'sites/default/files/pictures/picture-94-1480090110.jpg'
    - photo_id: 'P04'
      photo_url: 'sites/default/files/2019-01/clayton-profile-medium.jpeg'
  ids:
    photo_id:
      type: string
Note that the source contains relative paths to the images. Eventually, we will need an absolute path to them. Therefore, the SOURCE_DOMAIN constant is created to assemble the absolute path in the process pipeline. Also, note that one of the rows contains an empty photo_url. No file can be created without a proper URL. In the process section we will accommodate for this. An alternative could be to filter out invalid data in a source clean up operation before executing the migration.
Another important thing to note is that the row identifier photo_id is of type string. You need to explicitly tell the system the name and type of the identifiers you want to use. The configuration for this varies slightly from one source plugin to another. For the embedded_data plugin, you do it using the ids configuration key. It is possible to have more than one source column as identifier. For example, if the combination of two columns (e.g. name and date of birth) are required to uniquely identify each element (e.g. person) in the source.
You can get the full code example at https://github.com/dinarcon/ud_migrations The module to enable is UD migration dependencies introduction whose machine name is ud_migrations_dependencies_intro. The migration to run is udm_dependencies_intro_image. Refer to this article to learn where the module should be placed.
Process section definition
The fields to map in the process section will depend on the target. For files and images, only one entity property is required: uri. Its value should be set to the file path within Drupal using stream wrappers. In this example, the public stream (public://) is used to store the images in a location that is publicly accessible by any visitor to the site. If the file was already in the system and we knew the path the whole process section for this migration could be reduced to two lines:
process:
  uri: source_column_file_uri
That is rarely the case though. Fortunately, there are many process plugins that allow you to transform the available data. When combined with constants and pseudofields, you can come up with creative solutions to produce the format expected by your destination.
Skipping invalid records
The source for this migration contains one record that lacks the URL to the photo. No image can be imported without a valid path. Let’s accommodate for this. In the same step, a pseudofield will be created to extract the name of the file out of its path.
psf_destination_filename:
  - plugin: callback
    callable: basename
    source: photo_url
  - plugin: skip_on_empty
    method: row
    message: 'Cannot import empty image filename.'
The psf_destination_filename pseudofield uses the callback plugin to derive the filename from the relative path to the image. This is accomplished using the basename PHP function. Also, taking advantage of plugin chaining, the system is instructed to skip process the row if no filename could be obtained. For example, because an empty source value was provided. This is done by the skip_on_empty which is also configured log a message to indicate what happened. In this case, the message is hardcoded. You can make it dynamic to include the ID of the row that was skipped using other process plugins. This is left as an exercise to the curious reader. Feel free to share your answer in the comments below.
Tip: To read the messages log during any migration, execute the following Drush command: drush migrate:messages [migration-id].
Creating the destination URI
The next step is to create the location where the file is going to be saved in the system. For this, the psf_destination_full_path pseudofield is used to concatenate the value of a constant defined in the source and the file named obtained in the previous step. As explained before, order is important when using pseudofields as part of the migrate process pipeline. The following snippet shows how to do it:
psf_destination_full_path:
  - plugin: concat
    source:
      - constants/DRUPAL_FILE_DIRECTORY
      - '@psf_destination_filename'
  - plugin: urlencode
The end result of this operation would be something like public://portrait/micky-cropped.jpg. The URI specifies that the image should be stored inside a portrait subdirectory inside Drupal’s public file system. Copying files to specific subdirectories is not required, but it helps with file organizations. Also, some hosting providers might impose limitations on the number of files per directory. Specifying subdirectories for your file migrations is a recommended practice.
Also note that after the URI is created, it gets encoded using the urlencode plugin. This will replace special characters to an equivalent string literal. For example, é and ç will be converted to %C3%A9 and %C3%A7 respectively. Space characters will be changed to %20. The end result is an equivalent URI that can be used inside Drupal, as part of an email, or via another medium. Always encode any URI when working with Drupal migrations.
Creating the source URI
The next step is to create assemble an absolute path for the source image. For this, you concatenate the domain stored in a source constant and the image relative path stored in a source column. The following snippet shows how to do it:
psf_source_image_path:
  - plugin: concat
    delimiter: '/'
    source:
      - constants/SOURCE_DOMAIN
      - photo_url
  - plugin: urlencode
The end result of this operation will be something like https://agaric.coop/sites/default/files/2018-12/micky-cropped.jpg. Note that the concat and urlencode plugins are used just like in the previous step. A subtle difference is that a delimiter is specifying in the concatenation step. This is because, contrary to the DRUPAL_FILE_DIRECTORY constant, the SOURCE_DOMAIN constant does not end with a slash (/). This was done intentionally to highlight two things. First, it is important to understand your source data. Second, you can transform it as needed by using various process plugins.
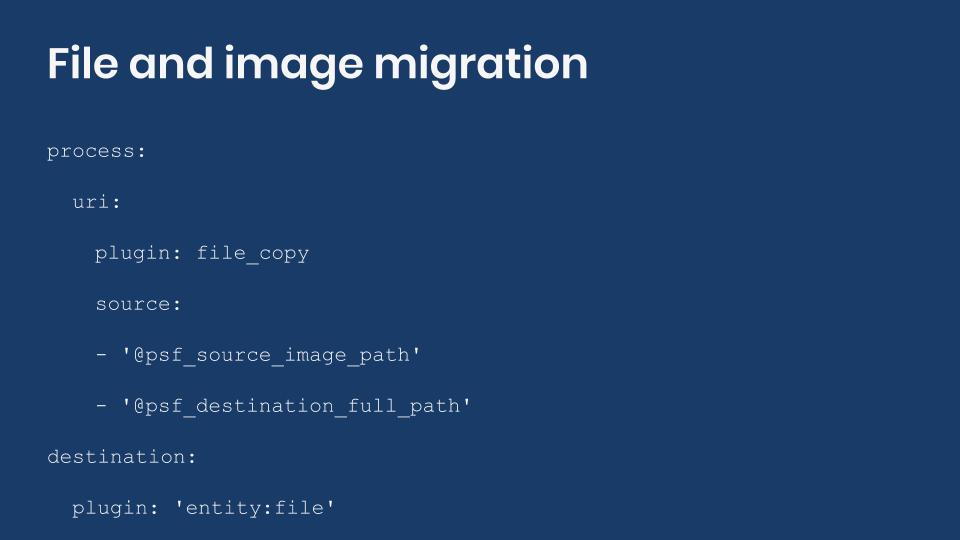
Copying the image file to Drupal
Only two tasks remain to complete this image migration: download the image and assign the uri property of the file entity. Luckily, both steps can be accomplished at the same time using the file_copy plugin. The following snippet shows how to do it:
uri:
  plugin: file_copy
  source:
    - '@psf_source_image_path'
    - '@psf_destination_full_path'
  file_exists: 'rename'
  move: FALSE
The source configuration of file_copy plugin expects an array of two values: the URI to copy the file from and the URI to copy the file to. Optionally, you can specify what happens if a file with the same name exists in the destination directory. In this case, we are instructing the system to rename the file to prevent name clashes. The way this is done is appending the string _X to the filename and before the file extension. The X is a number starting with zero (0) that keeps incrementing until the filename is unique. The move flag is also optional. If set to TRUE it tells the system that the file should be moved instead of copied. As you can guess, Drupal does not have access to the file system in the remote server. The configuration option is shown for completeness, but does not have any effect in this example.
In addition to downloading the image and place it inside Drupal’s file system, the file_copy also returns the destination URI. That is why this plugin can be used to assign the uri destination property. And that’s it, you have successfully imported images into Drupal! Clever use of the process pipeline, isn’t it? ;-)
One important thing to note is an image’s alternative text, title, width, and height are not associated with the file entity. That information is actually stored in a field of type image. This will be illustrated in the next article. To reiterate, the same approach to migrate images can be used to migrate any file type.
Technical note: The file entity contains other properties you can write to. For a list of available options check the baseFieldDefinitions() method of the File class defining the entity. Note that more properties can be available up in the class hierarchy. Also, this entity does not have multiple bundles like the node entity does.
What did you learn in today’s blog post? Had you created file migrations before? If so, had you followed a different approach? Did you know that you can do complex data transformations using process plugins? Did you know you can skip the processing of a row if the required data is not available? Please share your answers in the comments. Also, I would be grateful if you shared this blog post with your colleagues.
Next: Introduction to migration dependencies in Drupal
This blog post series, cross-posted at UnderstandDrupal.com as well as here on Agaric.coop, is made possible thanks to these generous sponsors. Contact Understand Drupal if your organization would like to support this documentation project, whether it is the migration series or other topics.
We had a fantastic and fun 2019! Agaric team members attended many conferences and hosted multiple trainings while building sites with some amazing clients. We also took on maintenance for a few sites, helping them gain more audience and stability as well as ease of use for visitors and administrators.
Platform Cooperativism Conference
Wow - more than a month has gone by since the New year began! Heads down, we now surface for some news an announcements on the who, what, where and when of the past year and the beginning of 2020. At the end of last year, Agaric members hosted a Town Hall style session at a conference titled: "Who Owns the World?" This was the yearly Platform Cooperativism event convened by Trebor Scholz at the New School in NYC. It was an incredible way to end the year. We met so many people involved in so many worthy projects that it was a bit overwhelming!
Attending the 2019 Platformcoop event in NYC was an incredible way to end 2019. We met so many people involved in so many worthy projects that it was a bit overwhelming! The biggest take-aways were learning about how many successful bicycle delivery platform cooperatives there are in many countries. We also found out that worker-owned cooperatives are sparse in places like Indonesia and Japan even though they have a healthy cooperative ecosystem. Cooperative governance is still a wide-open discussion going on amongst many cooperatives. It was nice to have some discussions with other cooperatives on how they go about creating their governance. We have been in touch with several people that we met at the conference this year.
Since the Platformcoop event in NYC, Agaric has been busy working hard on building two platforms. The first one to mention is the Find It platform, a robust opportunity locator, a participatory searchable directory of events, programs and organizations.
Find It Platform
Last year we connected with the City of Cambridge, Massachusetts as they were met with the challenge of getting their residents more engaged in community activities and increasing usage of public spaces. We worked closely with the Kids Council in Cambridge to coordinate an effort between government, the residents of the city, and local coding groups to design a platform that would provide residents the means to more easily navigate a directory of public events based on their age and interests.
The resulting platform is named Find It, and it was developed by our team of worker-owners at Agaric.
To give you an idea of the value the platform can bring to the residents of a city, here is a PSA on Find It to the residents of Cambridge.
After seeing how successful Find It has been in enriching the communities in Cambridge, we are eager to invite other cities to join in the collaboration. FindIT is built on Drupal, free and open-source software that ensures adopters a powerful and affordable tool that can be altered to suit the needs of the city it serves. Better yet, surveys and interview questions for city residents are already prepared from the Find It Cambridge collaboration. As more cities get involved in the Find It project, we will be able to increase its capabilities all the while decreasing the cost of the service.
Drutopia
A budding platform cooperative that Agaric has collaboratively built with other Drupal shops and freelance contributors is, Drutopia, an ecosystem of Drupal distributions, built and managed as a software cooperative. Soon Agaric will be offering what we call a Libre Software as a Service program, which will allow people to host their site through us, similar to online website builders but governed democratically and with the power of Drupal behind it all. You can find more information on the Drutopia website: https://drutopia.org
Contributing Back to Drupal
Working with Drupal, Agaric has led some data migration training workshops at some Drupal camps. We hosted a migration training in San Francisco at BADcamp - Bay Area Drupal Camp as well as a session on growing the community and scaling democracy. The team hosted a full day, sold-out training for 45 people at DrupalCon Seattle in 2019. We are engaged to host more trainings at the upcoming 2020 DrupalCon in Minnesota in May of 2020. We recently hosted a migration training at DrupalCamp New Jersey at Princeton and these are our upcoming scheduled data migration trainings:
- March 18 MidCamp - Drupal 8 Upgrade All Day Training
- May 18 DrupalCon Minneapolis - Drupal 8 Content Migrations All Day Training
- May 19 DrupalCon Minneapolis - Upgrading to Drupal 8 Using the Migrate API All Day Training
You can see the list and join us - https://agaric.coop/blog/make-2020-year-you-begin-upgrade-drupal-8-upcoming-trainings-and-resources
We have also been busy working on contributed modules. Currently, Gnuget is working on making https://www.drupal.org/project/filefield_sources stable and at the same time compatible with Drupal 9.
Forging Connections in Mexico
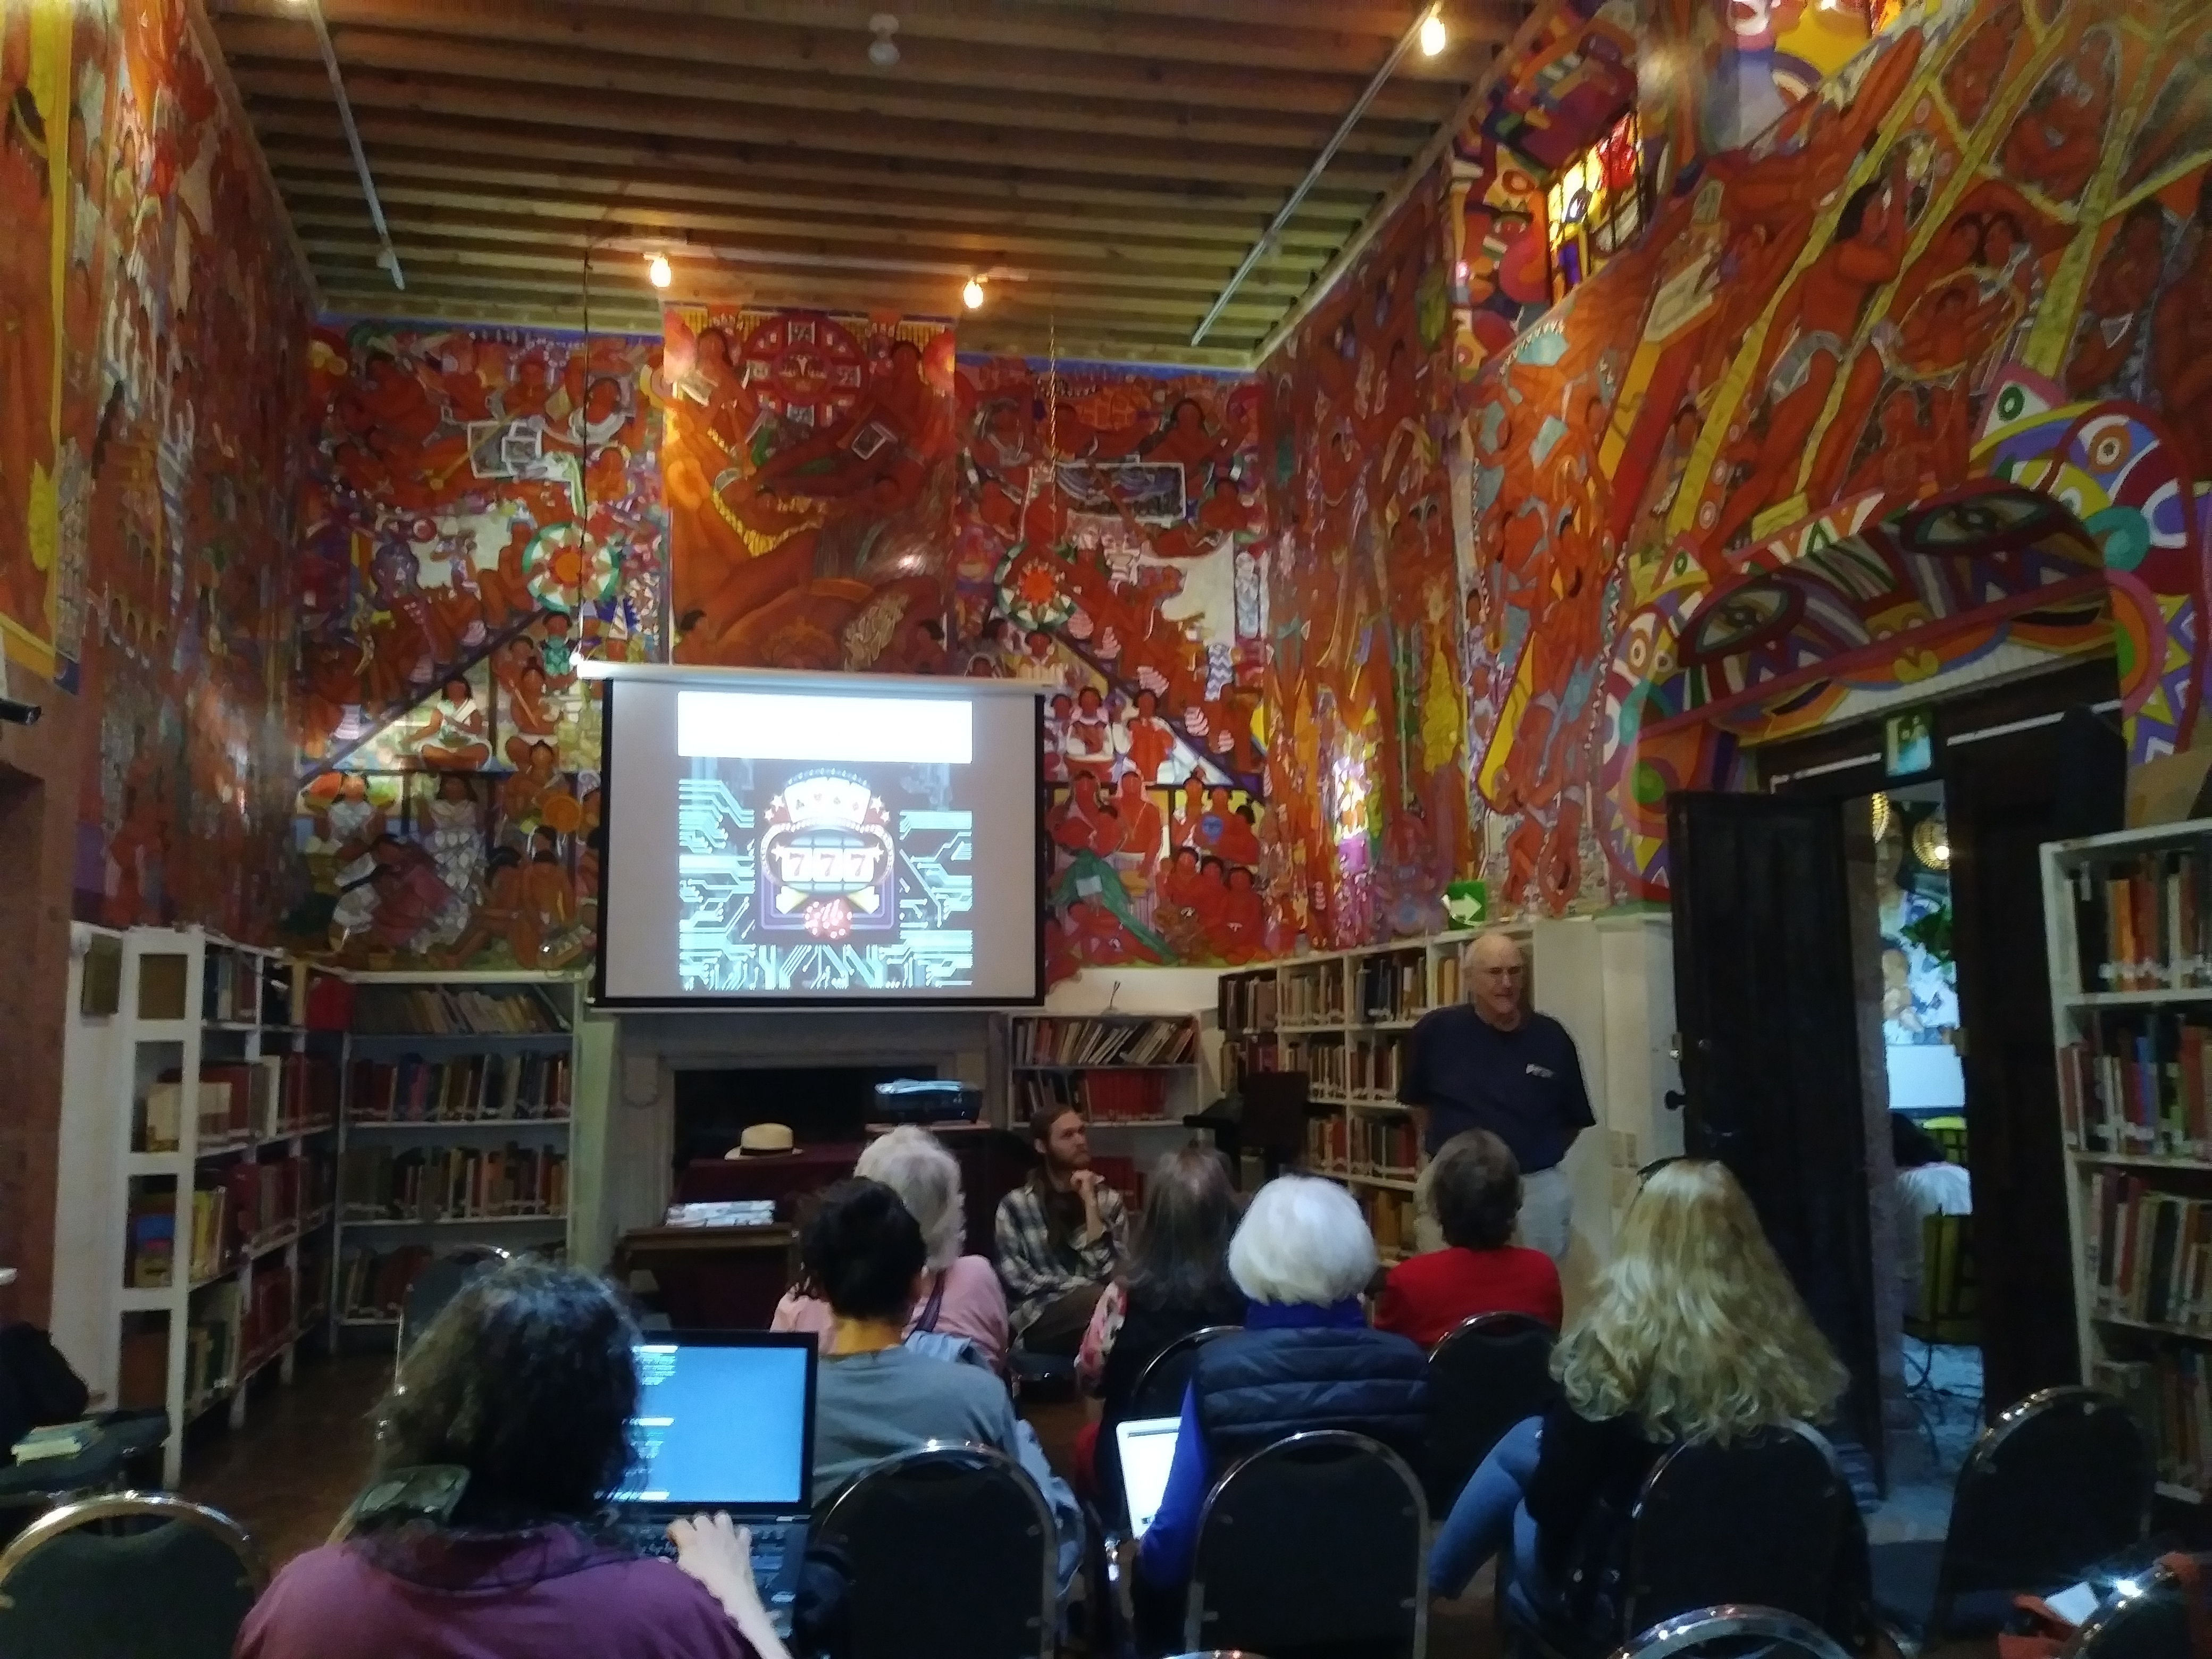
Some Agarics are also headed back to San Miguel de Allende, Mexico to continue a series of lectures and workshops on security, privacy, surveillance, and Platform Cooperativism at the local Biblioteque, in mid-February. The lecture is titled: Platform Cooperativism, Surveillance Capitalism, Predictive Analysis and You.
In 2018, we made our first visit to the Center for Global Justice in San Miguel de Allende when Micky was asked to speak at an Encuentro (gathering) in Mexico City to celebrate the victory of Mexico's electrical workers' union (SME). SME workers were fired en masse in 2009 but stayed united and fought back. They now provide electricity to central Mexico as a co-op under democratic workers' control! This visit activated an idea to organize trips to Mexico to host workshops and lectures specifically on software freedom and security with an introduction to protecting your privacy online. The next Workshop/Lecture tour will happen February 2020 - We hosted some workshops earlier this year and you can read about them here: https://agaric.coop/blog/micky-lead-free-software-trainings-mexico
2019 was an exciting year for Agaric as we traveled to teach and to learn. Micky presented as a Keynote speaker at two major events for developers in New England, NerdSummit and the Free Software Foundation's yearly event, LibrePlanet. She will be back again this year with a presentation on Surveillance Capitalism, Predictive Analysis and YOU. View the LibrePlanet Keynote here:
MayFirst Movement Technology
As active members of MayFirst Movement Technology, an organization providing web hosting, email services, and other free software tools to its members. MFMT also advocates for an open web and ethical technology. This year, Micky was elected by the members to serve on the board of the new cooperative formed by the members. Together, we are building online and offline workshops and discussions on freedom and raising awareness on the need to have a web host that is ethical and that you truly trust to protect you and your data.
Agaric continues to host a weekly online gathering where everyone shares methods and processes and ideas for sharing our knowledge and learning from others. You can join us any Wednesday for Show and Tell - lurk, engage or contribute! We also have some new Agaric initiatives and we have launched some new client websites as well as redesigns of other sites. We continue to reach out to share the knowledge we have gained while including as many people as we can in the process of learning to use free software to make a better planet and to make a better life for all!