At noon on Wednesday July 22nd, 2015, Richard Stallman (RMS) and Noam Chomsky met for the first time. We met in Noam's office, located in the Stata building on the MIT campus in Cambridge, Massachusetts, where Richard also has an office. We sat down to discuss the Free Software Movement, Digital Restrictions Management, then we briefly touched on domain name seizures, workers rights and worker-cooperatives. The atmosphere was jovial yet serious, and the discussion was soon underway.

Noam asked, what is the Free Software Foundation and movement all about? Richard responded that The Free Software Foundation is a nonprofit with a worldwide mission to promote computer user freedom and to defend the rights of all free software users. We raise awareness about computing privacy issues and users rights, by exposing things like Digital Restrictions Management. The movement is our outreach to users seeking adoption of free software and informing the network on issues that support free software and working to change attitudes and support laws that make free software remain free.
RMS then took the time to explain Digital Restrictions Management and a little known practice called domain name seizure. The US government can arbitrarily take a domain away from the domain owner without court approval. There are many reasons a domain may be seized, If your domain ends with .com, no matter what country you are based in, you are subject to VeriSign helping the U.S. Government seize your domain.
On the topic of Digital Restrictions Management, Richard detailed how it prevents people from being good neighbors and sharing files. DRM is often written as "Digital Rights Management", but this is misleading, since it refers to systems that are designed to take away and limit your rights.
Below is a quote by each and a few links to sites with background information:
Richard Stallman
"Isn't it ironic that the proprietary software developers call us communists? We are the ones who have provided for a free market, where they allow only monopoly. … if the user chooses this proprietary software package, he then falls into this monopoly for support … the only way to escape from monopoly is to escape from proprietary software, and that is what the free software movement is all about. We want you to escape and our work is to help you escape. We hope you will escape to the free world."

Richard Stallman websites:
https://en.wikipedia.org/wiki/Richard_Stallman
http://fsf.org
https://gnu.org
https://stallman.org
Noam Chomsky
"How people themselves perceive what they are doing is not a question that interests me. I mean, there are very few people who are going to look into the mirror and say, 'That person I see is a savage monster'; instead, they make up some construction that justifies what they do. If you ask the CEO of some major corporation what he does he will say, in all honesty, that he is slaving 20 hours a day to provide his customers with the best goods or services he can and creating the best possible working conditions for his employees. But then you take a look at what the corporation does, the effect of its legal structure, the vast inequalities in pay and conditions, and you see the reality is something far different."

Noam Chomsky websites:
https://en.wikipedia.org/wiki/Noam_Chomsky
http://web.mit.edu/linguistics/people/faculty/chomsky
http://www.chomsky.info
At the end of our first meeting, Noam suggested that we take a look at congress and see who is voting against the TPP, and then contact those congress members with information about free software initiatives. We all realized that we barely had time to scratch the surface of the talking points we need to cover and agreed to meet again and discuss overlapping issues that are of concern to both the labor movement and the free software movement. We will be targeting issues that have solutions ready to be implemented, and making sure we are all aware of the dangers of proprietary software.
The next meeting will be sometime in the next few months... This is a beginning.
The Nonprofit Technology Conference (NTC) is one of the largest of its kind and is happening in Portland from March 13th-15th. On March 12th, the day before NTC a "Pre-Conference Day" is taking place to take a deeper dive into working with specific tools such as Drupal and Wordpress.
If you haven't already, you can register for NTC and the Pre-Conference Day at http://nten.org/ntc/registration/.
Ben and I will be presenting on migrating your website to Drupal 8. Here are the full details. Hope to see you there!
Migrating to Drupal 8 with Confidence
March 12th, 2:15-3:15pm
Drupal 8 is a powerful platform, with features many nonprofits are using to deepen their impact. However, migrations to any new platform can be hard. Fortunately, Drupal 8 comes with a suite of migration tools built-in, helping organizations migrate their website from previous versions of Drupal or any other source. As of Drupal 8, Drupal has also changed its development process so that features are continually added and upgrades to future versions will no longer require migration, so this may be the last migration you need to do!
We’ll walk through what is needed to effectively prepare for a migration, touching upon the specifics for WordPress and Drupal 7. Using real world examples, we’ll then look at what migrating users, blog posts and other content looks like. The session will wrap up with important “gotchas”, a list of further resources and time for Q&A. By the end you’ll have the tools and resources needed to migrate confidently.
In the previous two blog posts, we learned to migrate data from JSON and XML files. We presented to configure the migrations to fetch remote files. In today's blog post, we will learn how to add HTTP request headers and authentication to the request. . For HTTP authentication, you need to choose among three options: Basic, Digest, and OAuth2. To provide this functionality, the Migrate API leverages the Guzzle HTTP Client library. Usage requirements and limitations will be presented. Let's begin.
Migrate Plus architecture for remote data fetching
The Migrate Plus module provides an extensible architecture for importing remote files. It makes use of different plugin types to fetch file, add HTTP authentication to the request, and parse the response. The following is an overview of the different plugins and how they work together to allow code and configuration reuse.
Source plugin
The url source plugin is at the core of the implementation. Its purpose is to retrieve data from a list of URLs. Ingrained in the system is the goal to separate the file fetching from the file parsing. The url plugin will delegate both tasks to other plugin types provided by Migrate Plus.
Data fetcher plugins
For file fetching, you have two options. A general-purpose file fetcher for getting files from the local file system or via stream wrappers. This plugin has been explained in detail on the posts about JSON and XML migrations. Because it supports stream wrapper, this plugin is very useful to fetch files from different locations and over different protocols. But it has two major downsides. First, it does not allow setting custom HTTP headers nor authentication parameters. Second, this fetcher is completely ignored if used with the xml or soap data parser (see below).
The second fetcher plugin is http. Under the hood, it uses the Guzzle HTTP Client library. This plugin allows you to define a headers configuration. You can set it to a list of HTTP headers to send along with the request. It also allows you to use authentication plugins (see below). The downside is that you cannot use stream wrappers. Only protocols supported by curl can be used: http, https, ftp, ftps, sftp, etc.
Data parsers plugins
Data parsers are responsible for processing the files considering their type: JSON, XML, or SOAP. These plugins let you select a subtree within the file hierarchy that contains the elements to be imported. Each record might contain more data than what you need for the migration. So, you make a second selection to manually indicate which elements will be made available to the migration. Migrate plus provides four data parses, but only two use the data fetcher plugins. Here is a summary:
jsoncan use any of the data fetchers. Offers an extra configuration option calledinclude_raw_data. When set to true, in addition to all thefieldsmanually defined, a new one is attached to the source with the nameraw. This contains a copy of the full object currently being processed.simple_xmlcan use any data fetcher. It uses the SimpleXML class.xmldoes not use any of the data fetchers. It uses the XMLReader class to directly fetch the file. Therefore, it is not possible to set HTTP headers or authentication.soapdoes not use any data fetcher. It uses the SoapClient class to directly fetch the file. Therefore, it is not possible to set HTTP headers or authentication.
The difference between xml and simple_xml were presented in the previous article.
Authentication plugins
These plugins add authentication headers to the request. If correct, you could fetch data from protected resources. They work exclusively with the http data fetcher. Therefore, you can use them only with json and simple_xml data parsers. To do that, you set an authentication configuration whose value can be one of the following:
basicfor HTTP Basic authentication.digestfor HTTP Digest authentication.oauth2for OAuth2 authentication over HTTP.
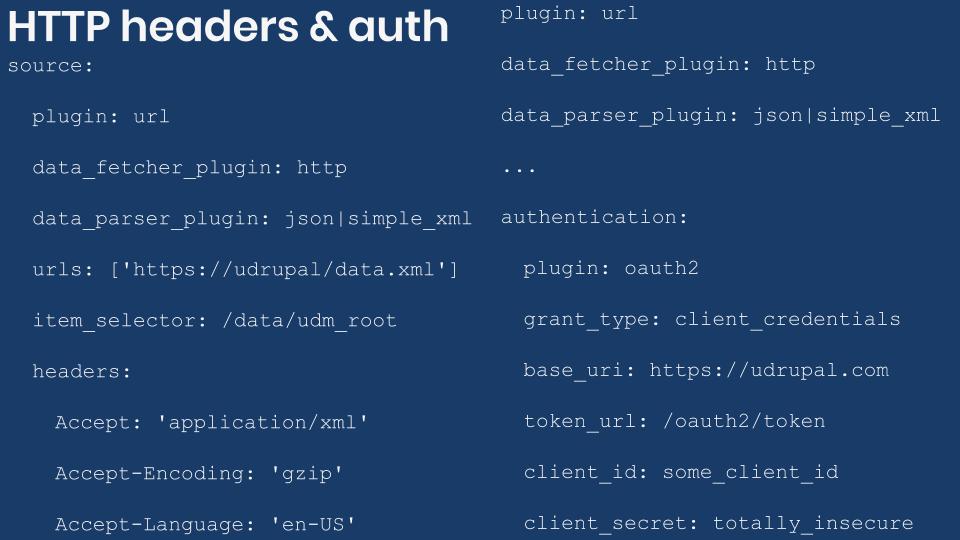
Below are examples for JSON and XML imports with HTTP headers and authentication configured. The code snippets do not contain real migrations. You can also find them in the ud_migrations_http_headers_authentication directory of the demo repository https://github.com/dinarcon/ud_migrations.
Important: The examples are shown for reference only. Do not store any sensitive data in plain text or commit it to the repository.
JSON and XML Drupal migrations with HTTP request headers and Basic authentication.
source: plugin: url data_fetcher_plugin: http # Choose one data parser. data_parser_plugin: json|simple_xml urls: - https://understanddrupal.com/files/data.json item_selector: /data/udm_root # This configuration is provided by theauthenticationhttpdata fetcher plugin. # Do not disclose any sensitive information in the headers. headers: Accept-Encoding: 'gzip, deflate, br' Accept-Language: 'en-US,en;q=0.5' Custom-Key: 'understand' Arbitrary-Header: 'drupal' # This configuration is provided by thebasicauthentication plugin. # Credentials should never be saved in plain text nor committed to the repo.: plugin: basic username: totally password: insecure fields: - name: src_unique_id label: 'Unique ID' selector: unique_id - name: src_title label: 'Title' selector: title ids: src_unique_id: type: integer process: title: src_title destination: plugin: 'entity:node' default_bundle: page
JSON and XML Drupal migrations with HTTP request headers and Digest authentication.
source: plugin: url data_fetcher_plugin: http # Choose one data parser. data_parser_plugin: json|simple_xml urls: - https://understanddrupal.com/files/data.json item_selector: /data/udm_root # This configuration is provided by theauthenticationhttpdata fetcher plugin. # Do not disclose any sensitive information in the headers. headers: Accept: 'application/json; charset=utf-8' Accept-Encoding: 'gzip, deflate, br' Accept-Language: 'en-US,en;q=0.5' Custom-Key: 'understand' Arbitrary-Header: 'drupal' # This configuration is provided by thedigestauthentication plugin. # Credentials should never be saved in plain text nor committed to the repo.: plugin: digest username: totally password: insecure fields: - name: src_unique_id label: 'Unique ID' selector: unique_id - name: src_title label: 'Title' selector: title ids: src_unique_id: type: integer process: title: src_title destination: plugin: 'entity:node' default_bundle: page
JSON and XML Drupal migrations with HTTP request headers and OAuth2 authentication.
source: plugin: url data_fetcher_plugin: http # Choose one data parser. data_parser_plugin: json|simple_xml urls: - https://understanddrupal.com/files/data.json item_selector: /data/udm_root # This configuration is provided by theauthenticationhttpdata fetcher plugin. # Do not disclose any sensitive information in the headers. headers: Accept: 'application/json; charset=utf-8' Accept-Encoding: 'gzip, deflate, br' Accept-Language: 'en-US,en;q=0.5' Custom-Key: 'understand' Arbitrary-Header: 'drupal' # This configuration is provided by theoauth2authentication plugin. # Credentials should never be saved in plain text nor committed to the repo.: plugin: oauth2 grant_type: client_credentials base_uri: https://understanddrupal.com token_url: /oauth2/token client_id: some_client_id client_secret: totally_insecure_secret fields: - name: src_unique_id label: 'Unique ID' selector: unique_id - name: src_title label: 'Title' selector: title ids: src_unique_id: type: integer process: title: src_title destination: plugin: 'entity:node' default_bundle: page
To use OAuth2 authentication, you need to install the `sainsburys/guzzle-oauth2-plugin` package as suggested in Migrate Plus’ `composer.json` file. You can do it via Composer issuing the following command: `composer require sainsburys/guzzle-oauth2-plugin`. Otherwise, you would get an error similar to the following:
[error]  Error: Class 'Sainsburys\Guzzle\Oauth2\GrantType\ClientCredentials'
not found in Drupal\migrate_plus\Plugin\migrate_plus\authentication\OAuth2->getAuthenticationOptions()
(line 46 of /var/www/drupalvm/drupal/web/modules/contrib/migrate_plus/src/Plugin/migrate_plus/authentication/OAuth2.php)
#0 /var/www/drupalvm/drupal/web/modules/contrib/migrate_plus/src/Plugin/migrate_plus/data_fetcher/Http.php(100):
Drupal\migrate_plus\Plugin\migrate_plus\authentication\OAuth2->getAuthenticationOptions()
What did you learn in today’s blog post? Did you know the configuration names for adding HTTP request headers and authentication to your JSON and XML requests? Did you know that this was limited to the parsers that make use of the http fetcher? Please share your answers in the comments. Also, I would be grateful if you shared this blog post with others.
Next: Migrating Google Sheets into Drupal
This blog post series, cross-posted at UnderstandDrupal.com as well as here on Agaric.coop, is made possible thanks to these generous sponsors: Drupalize.me by Osio Labs has online tutorials about migrations, among other topics, and Agaric provides migration trainings, among other services. Contact Understand Drupal if your organization would like to support this documentation project, whether it is the migration series or other topics.
We've been honored to help some key curators of content get the word out.
GEO
GEO.coop, Grassroots Economic Organizing, is a decentralized collective of educators, researchers and grassroots activists working to promote a solidarity economy based on democratic participation, worker and community ownership, social and economic justice, and ecological sustainability. Their raising up of and participation in grassroots journalism, organizing support, cross-sector networking and movement-building, and educational and organizational resources helps catalyze worker co-ops & the solidarity economy.
Portside
Portside.org is a digital media outlet that publishes and curates articles and videos of interest to the left. This curation lifts up critical voices in an age of media saturation and facilitates thoughtful, bold dialog online. Read more about our work with Portside.
CRLA Homepage
Based on our assessment of CRLA's most important audience and goals—working class, immigrant, and bilingual potential clients need to be able to find questions or get in contact—we identified the following as important elements of their homepage:
- a visible call to action to use their provided phone number to get in touch with someone
- prominent statements and links to resources regarding COVID-19
- a list of news teasers to highlight their great work
- an indication of what sorts of questions they are able to answer
Yes it's true, for the past few months we've been hard at work with a lot of other co-authors on The Definitive Guide to Drupal 7.
The Definitive Guide to Drupal 7 accelerates people along the Drupal learning curve by covering all aspects of building web sites with Drupal: architecture and configuration; module development; front end development; running projects sustainably; participating in the community; and contributing to Drupal's code and documentation.
Check out the website today! http://definitivedrupal.org/

After years of giving a terrible initial experience to people who want to share their first project on Drupal.org, the Project Applications Process Revamp is a Drupal Association key priority for the first part of 2017.
A plan for incentivizing code review of every project, not just new ones, after the project applications revamp is open for suggestions and feedback.
Which makes it excellent timing that right now you can get credit on your Drupal.org profile and that of your organization, boosting marketplace ranking, for reviewing the year-old backlog of project applications requesting review. The focus is on security review for these project applications, but if you want to give a thorough review and then give your thoughts on how project reviews (for any project that opts in to this quality marker) should be performed and rewarded going forward, now's the time and here's the pressing need.

To the extent possible under law, Clayton Dewey has waived all copyright and related or neighboring rights to Build and Manage Online Donations in Drupal with the Give Module. This work is published from: United States.
In other words, please reuse and remix this article as you see fit! No attribution is required, it just needs to continue to stay in the Public Domain.
In the last blog post we were introduced to managing migration as configuration entities using Migrate Plus. Today, we will present some benefits and potential drawbacks of this approach. We will also show a recommended workflow for working with migration as configuration. Let’s get started.
What is the benefit of managing migration as configurations?
At first sight, there does not seem to be a big difference between defining migrations as code or configuration. You can certainly do a lot without using Migrate Plus’ configuration entities. The series so far contains many examples of managing migrations as code. So, what are the benefits of adopting s configuration entities?
The configuration management system is one of the major features that was introduced in Drupal 8. It provides the ability to export all your site’s configuration to files. These files can be added to version control and deployed to different environments. The system has evolved a lot in the last few years, and many workflows and best practices have been established to manage configuration. On top of Drupal core’s incremental improvements, a big ecosystem has sprung in terms of contributed modules. When you manage migrations via configuration, you can leverage those tools and workflows.
Here are a few use cases of what is possible:
- When migrations are managed in code, you need file system access to make any changes. Using configuration entities allows site administrators to customize or change the migration via the user interface. This is not about rewriting all the migrations. That should happen during development and never on production environments. But it is possible to tweak certain options. For example, administrators could change the location to the file that is going to be migrated, be it a local file or on a remote server.
- When writing migrations, it is very likely that you will work on a subset of the data that will eventually be used to get content into the production environment. Having migrations as configuration allow you to override part of the migration definition per environment. You could use the Configuration Split module to configure different source files or paths per environment. For example, you could link to a small sample of the data in development, a larger sample in staging, and the complete dataset in production.
- It would be possible to provide extra configuration options via the user interface. In the article about adding HTTP authentication to fetch remote JSON and XML files, the credentials were hardcoded in the migration definition file. That is less than ideal and exposes sensitive information. An alternative would be to provide a configuration form in the administration interface for the credentials to be added. Then, the submitted values could be injected into the configuration for the migration. Again, you could make use of contrib modules like Configuration Split to make sure those credentials are never exported with the rest of your site’s configuration.
- You could provide a user interface to upload migration source files. In fact, the Migrate source UI module does exactly this. It exposes an administration interface where you have a file field to upload a CSV file. In the same interface, you get a list of supported migrations in the system. This allows a site administrator to manually upload a file to run the migration against. Note: The module is supposed to work with JSON and XML migrations. It did not work during my tests. I opened this issue to follow up on this.
These are some examples, but many more possibilities are available. The point is that you have the whole configuration management ecosystem at your disposal. Do you have another example? Please share it in the comments.
Are there any drawbacks?
Managing configuration as configuration adds an extra layer of abstraction in the migration process. This adds a bit of complexity. For example:
- Now you have to keep the
uuidandidkeys in sync. This might not seem like a big issue, but it is something to pay attention to. - When you work with migrations groups (explained in the next article), your migration definition could live in more file.
- The configuration management system has its own restrictions and workflows that you need to follow, particularly for updates.
- You need to be extra careful with your YAML syntax, especially if syncing configuration via the user interface. It is possible to import invalid configuration without getting an error. It is until the migration fails that you realize something is wrong.
Using configuration entities to define migrations certainly offers lots of benefits. But it requires being extra careful managing them.
Workflow for managing migrations as configuration entities
The configuration synchronization system has specific workflows to make changes to configuration entities. This imposes some restrictions in the way you make updates to the migration definitions. Explaining how to manage configuration could use another 31 days blog post series. ;-) For now, only a general overview will be presented. The general approach is similar to managing configuration as code. The main difference is what needs to be done for changes to the migration files to take effect.
You could use the “Configuration synchronization” administration interface at /admin/config/development/configuration. In it you have the option to export or import a “full archive” containing all your site’s settings or a “single item” like a specific migration. This is one way to manage migrations as configuration entities which lets you find their UUIDs if not set initially. This approach can be followed by site administrators without requiring file system access. Nevertheless, it is less than ideal and error-prone. This is not the recommended way to manage migration configuration entities.
Another option is to use Drush or Drupal Console to synchronize your site’s configuration via the command line. Similarly to the user interface approach, you can export and import your full site configuration or only single elements. The recommendation is to do partial configuration imports so that only the migrations you are actively working on are updated.
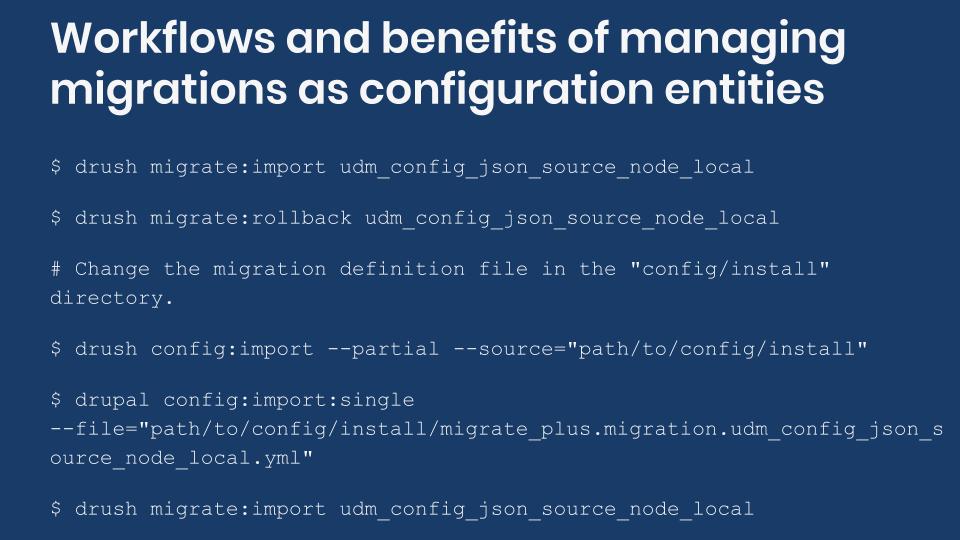
Ideally, your site’s architecture is completed before the migration starts. In practice, you often work on the migration while other parts of the sites are being built. If you were to export and import the entire site’s configuration as you work on the migrations, you might inadvertently override unrelated pieces of configurations. For instance, this can lead to missing content types, changed field settings, and lots of frustration. That is why doing partial or single configuration imports is recommended. The following code snippet shows a basic Drupal workflow for managing migrations as configuration:
# 1) Run the migration.
$ drush migrate:import udm_config_json_source_node_local

# 2) Rollback migration because the expected results were not obtained.
$ drush migrate:rollback udm_config_json_source_node_local

# 3) Change the migration definition file in the "config/install" directory.

# 4a) Sync configuration by folder using Drush.
$ drush config:import --partial --source="modules/custom/ud_migrations/ud_migrations_config_json_source/config/install"

# 4b) Sync configuration by file using Drupal Console.
$ drupal config:import:single --file="modules/custom/ud_migrations/ud_migrations_config_json_source/config/install/migrate_plus.migration.udm_config_json_source_node_local.yml"

# 5) Run the migration again.
$ drush migrate:import udm_config_json_source_node_local
Note the use of the --partial and --source flags in the migration import command. Also, note that the path is relative to the current working directory from where the command is being issued. In this snippet, the value of the source flag is the directory holding your migrations. Be mindful if there are other non-migration related configurations in the same folder. If you need to be more granular, Drupal Console offers a command to import individual configuration files as shown in the previous snippet.
Note: Uninstalling and installing the module again will also apply any changes to your configuration. This might produce errors if the migration configuration entities are not removed automatically when the module is uninstalled. Read this article for details on how to do that.
What did you learn in today’s blog post? Did you know the know the benefits and trade-offs of managing migrations as configuration? Did you know what to do for changes in migration configuration entities to take effect? Share your answers in the comments. Also, I would be grateful if you share this blog post with others.
Next: Using migration groups to share configuration among Drupal migrations
This blog post series, cross-posted at UnderstandDrupal.com as well as here on Agaric.coop, is made possible thanks to these generous sponsors. Contact Understand Drupal if your organization would like to support this documentation project, whether it is the migration series or other topics.
Overview
You will learn to use the Migrate API to upgrade your Drupal 6/7 site to Drupal 11. Check how the automated upgrade procedure can help you get a head start in writing the migrations. You will learn different migration strategies, how to accommodate changes in site architecture, tips on troubleshooting issues, and much more.
With the maturity of Drupal 11, now is a great time to upgrade your site from Drupal 6 or 7.
There will be plenty of hands on examples to demonstrate different migration strategies even for projects that do not offer automatic upgrade paths. Time will also be allocated to answer attendee’s project specific questions for topics not covered in the predefined material.
Request a Private Training

Our relationship with technology is largely toxic- think Volkswagen cheating, Facebook spying, Uber being Uber. Tech is ruled by the elite and we are mostly at its mercy. As powerful movements have emerged challenging predatory power structures, let us do the same with technology.
Free/Open Source Software movements offer an alternative to corporate, predatory, proprietary technology. And yet Free Software still reflects many of these same oppressive relationships. One way to change that is with accountability.
Free Software means that anyone is free to read, use and remix the code that the software was written in. This helps with accountability because, unlike proprietary software, experts and community members can audit the code for security flaws and disingenuous functionality. However, there are several limitations with free software-
- Reviewing the code is only meaningful to coders.
- Changing the code or design can only be done by coders.
Only a small percentage of the world can code. An even smaller percentage have the time to write code for Free Software and an even smaller number have the time and expertise in any given project. This coder-centric framework also diminishes the many other skills essential to software: design, user research, project management, documentation, training, outreach to name a few.
As a major survey lead by GitHub supports (and comes as little surprise), the Free Software community is mostly white, male, cisgendered, financially well off, formally educated, able-bodied, straight, English speakers and citizens of Global North countries.
This means that the same groups of people designing and building proprietary software are also building Free Software. It means that despite its open licensing, the Free Software movement maintains the status quo of white supremacy, patriarchy and capitalism.
For Free Software to truly be free - to be free for anyone to build and use, we need to radically restructure our projects. It means building diverse communities where we are accountable to one another.
Many free software projects have already begun this work. Just a few examples-- Rust crafting and enforcing a thoughtful code of conduct, Ghost valuing design and user research throughout their work, Backdrop governing projects democratically and mentoring new contributors.
When we embody inclusion and accountability we grow vibrant communities building and using software that offers a clear alternative to the corporate, proprietary software; a software we can truly call free.
Therapy Fidelity is a mobile interface that displays 132 sequential steps of cognitive behavioral therapy (CBT) for treating posttraumatic stress disorder (PTSD) to improve the fidelity of following the treatment protocol.
The Challenge
Leaders in the field of psychotherapy have been encouraging psychotherapists to adopt evidence-based treatments such as CBT for 20 years but it has been largely unsuccessful. Therapists have been unwilling and unable to rigorously follow CBT protocols with fidelity. Therapists cannot memorize all 132 steps, and patients have very limited access to the steps. As a result, treatment of patients suffers.
Child psychiatrist Michael Scheeringa, MD identified a solution for this problem—a mobile interface that displays a CBT treatment protocol and that can be viewed by therapists and patients simultaneously. Through the guidance of Dr. Scheeringa and in partnership with Tulane University, Agaric developed the Therapy Fidelity web app.
Our Approach
Designed For Use During a Therapy Session
When a patient attends their therapy session, it is far more likely that they arrive with a mobile phone than with a laptop. The need for a seamless mobile experience was one major reason we decided to build Therapy Fidelity as a single page application using React.js. Single page applications are great for reducing the number of network calls made to the host server since they do not need to request markup templates every time an end-user clicks to a different part of the site.
Consequently, most of the network calls made by the app are made to read or write data to one of several third party APIs. We worked to mitigate these, too, by using the React Query library, a powerful and configurable tool for fetching, caching, and updating data in React. The result is an app that clearly indicates when data is loading, allows the user to continue navigating the app while update requests are being processed, indicates the results of those requests once they resolve, and prevents redundant fetching of data that has already been cached—in other words, a fast, smooth, and intuitive end-user experience, even on a limited-bandwidth device. One additional benefit of the data caching—many third party APIs will bill per API call after a limited number of requests; without caching that data in the browser, these API services could get expensive fast.
Simple, Consistent, and Flexible Design Elements with Tailwind UI/CSS
Throughout the building process, we looked to Tailwind UI for example components. By doing so, we made sure that the app has a consistent look and feel and is responsive so that it looks good on devices of all screen sizes. As this app mostly functions as a utility dashboard, the pre-designed components sufficed for the apps aesthetic needs, meaning that Tailwind UI saved us a lot of time on design work. Often we had to make minor adjustments to the markup so that it would suit our specific needs, and very seldom did we need to add any custom classes to our CSS stylesheet, which incidentally results in removing the often expensive overhead of building and maintaining our CSS architecture. Again, this is great for an app with simple aesthetic needs but which also needs re-usable and flexible responsive components.
HIPAA Certified Storage with TrueVault
In order to facilitate a quickest time-to-market, we opted to utilize an existing HIPAA certified provider for the storage, retrieval, and access controls/monitoring of protected data. TrueVault provides a JavaScript library for communicating with their RESTful backend. Their backend includes provisions for dealing with all aspects of the data, such as authentication, authorization, logging, and so-on. We were able to use their Vault-based data model to separate patient records into individual silo's per-therapist, and use their group-based security to set nearly all relevant permissions for the app's use. TrueVault certainly comes with its limitations and challenges, but it sure would have taken quite a bit more time and resources to build and certify a custom storage system.
Automated Quality Assurance using Typescript and React Testing Library
Additionally, we needed to ensure that each client's data is stored and retrieved accurately. TypeScript, which provides a type system for JavaScript, helped to ensure that as our application passed data around, it was of the expected type. Using a typed language also reduces the possibility for software errors generally. Beyond using good tools to write the application, checks must be in place to ensure that as it evolves, things do not break. Here, we leveraged React Testing framework and other tools to walk through the functionality of the application and ensure that everything continued to function correctly, and even stored the correct data; By mocking (simulating) the TrueVault service we could inspect what the application would be storing there directly.
The Delicate Balance of Computing Large Sets of Sensitive Data
While the majority of permissions available to a logged in client were sufficient, there were cases where privileged tasks needed to be performed. Therapy Fidelity's People Like Me system is a great example. People Like Me involves a multi-step form which upon completion shows how many people with similar conditions were able to significantly improve their condition following the successful completion of a 3 month adherence to therapy protocol:
First, a patient selects for comparison the results of a single survey they have completed, consisting of numerical indicators for several psychological conditions (anxiety, depression, PTSD, etc.)
Second, they configure which parameters they would like to match on. For example, a patient could choose to only see how many people who had shared a similar pre-therapy anxiety score were able to improve their condition following therapy.
Finally, they view the results.
Now it must be acknowledged that this system is parsing through and accessing patient data in real time. Of course, it would be a breach of patient privacy law for the patient to have such access to all of this other patient data, so we made sure that all data was scrubbed before reaching storage to reduce any personally identifiable information, and that computations occurred securely on a server before serving back results to the client.
Rather than utilize something like a full VPS server that performed these functions for us, we were able to leverage functions-as-a-service to provide the specific privileged function access, specifically AWS Lambda functions. This helped us keep the surface area of the application as low as possible for security purposes, while providing server-side style functionality. The language we chose for these was Go, for its performance, excellent built-in framework, and because we were able to build for our needs with very minimal additional libraries, which again helps mitigate security concerns.
While these functions-as-a-service were used several times throughout the site, it will be hard to forget Dr. Scheeringa's excitement about the realization of the People Like Me tool.
What's Next?
Therapy Fidelity was an excellent development experience—both for the thrill of developing a single page app and for carrying on Agaric's history of building tools for medical and scientific communities. As always, we are looking forward to our next opportunity to engage in these communities and build something wonderful.
For any clinicians who happen to be reading this and are interested in using the Therapy Fidelity app for their own practice, Scheeringa Mind offers it as a service and provides a 30-day free trial. There are also plenty of video tutorials on how to use the app, which might help to preview just what you might be getting into.
As Scheeringa Mind Company grows and Therapy Fidelity sees more use, we will be sure to publish any updates or major achievements. We are anticipating great strides in research on CBT protocol and look forward to seeing the results.
Find It Cambridge is an online resource that empowers families, youth, and those who support them to easily find activities, services, and resources in Cambridge, Massachusetts. It serves as a one-stop-shop website for those who live and work in Cambridge.
Agaric led development and functionality-focused consulting on this project from its inception in 2016. In 2020, we upgraded the site and made the program locator and event finder platform that powers it available to all communities.
The Challenge
Building an event calendar and program directory central to people’s lives is challenging. City governments are notorious for silos and redundancy. The City of Cambridge was determined to do differently.
This started with thorough user research led by the city. Over 250 interviews and 1,250 surveys were completed by Cambridge residents and representatives from the city, schools, and community-based organizations. Taking the time to survey and interview everyday residents ensured we could confidently build a truly helpful site.
From that research we learned that the site needed:
- Powerful, but intuitive search for Cambridge residents
- Friendly authoring experience for service providers
- Phone number with a human on the other end
The Approach
To make the research findings a reality we combined forces with Terravoz, a digital research and development agency, and Todd Linkner, a designer and front-end developer who defined Find It Cambridge’s brand identity and developed an accompanying style guide.
A Search for Locals
There are hundreds of events, programs and organizations in Cambridge. To find exactly what one is looking for a sophisticated filtering system is a must. We chose Apache Solr, leader of the pack when it comes to advanced filtering.
One particularly interesting facet came out of Cambridge’s unique geography. Despite spanning a relatively small area, Cambridge’s neighborhood boundaries are infamously creative. Even longtime residents don’t necessarily know where one neighborhood ends and another starts. So, while filtering by neighborhood is helpful, we decided a visual aid was in order.
Todd Linkner created a custom SVG image file representing Cambridge’s neighborhoods. We then took that SVG file and wrote a custom module that associates each neighborhood map section to a Drupal vocabulary term. The result is a clickable map filter aiding site visitors in quickly finding programs and activities in their area.
 A clickable map allows residents to filter by neighborhood.
Supporting Service Providers
For a knowledge hub like Find It Cambridge to thrive, it needed buy in from service providers. Getting their input during the research phase set that relationship off on the right foot. The resounding feedback was that the site needed to be easy for them to use.
This proved to be a challenge because while ease of use was critical, it was also essential that events and programs have rich metadata. The more data we ask of users, the more complex interfaces become.
To address this we leveraged Drupal’s customizable dashboard and the Field Groups module.
Customized Dashboard
By default, the first page a user sees when logging into a Drupal site is an underwhelming user profile page.
We customized a dashboard with the key actions providers take on the site: creating new content, updating past content and answering questions about the site.
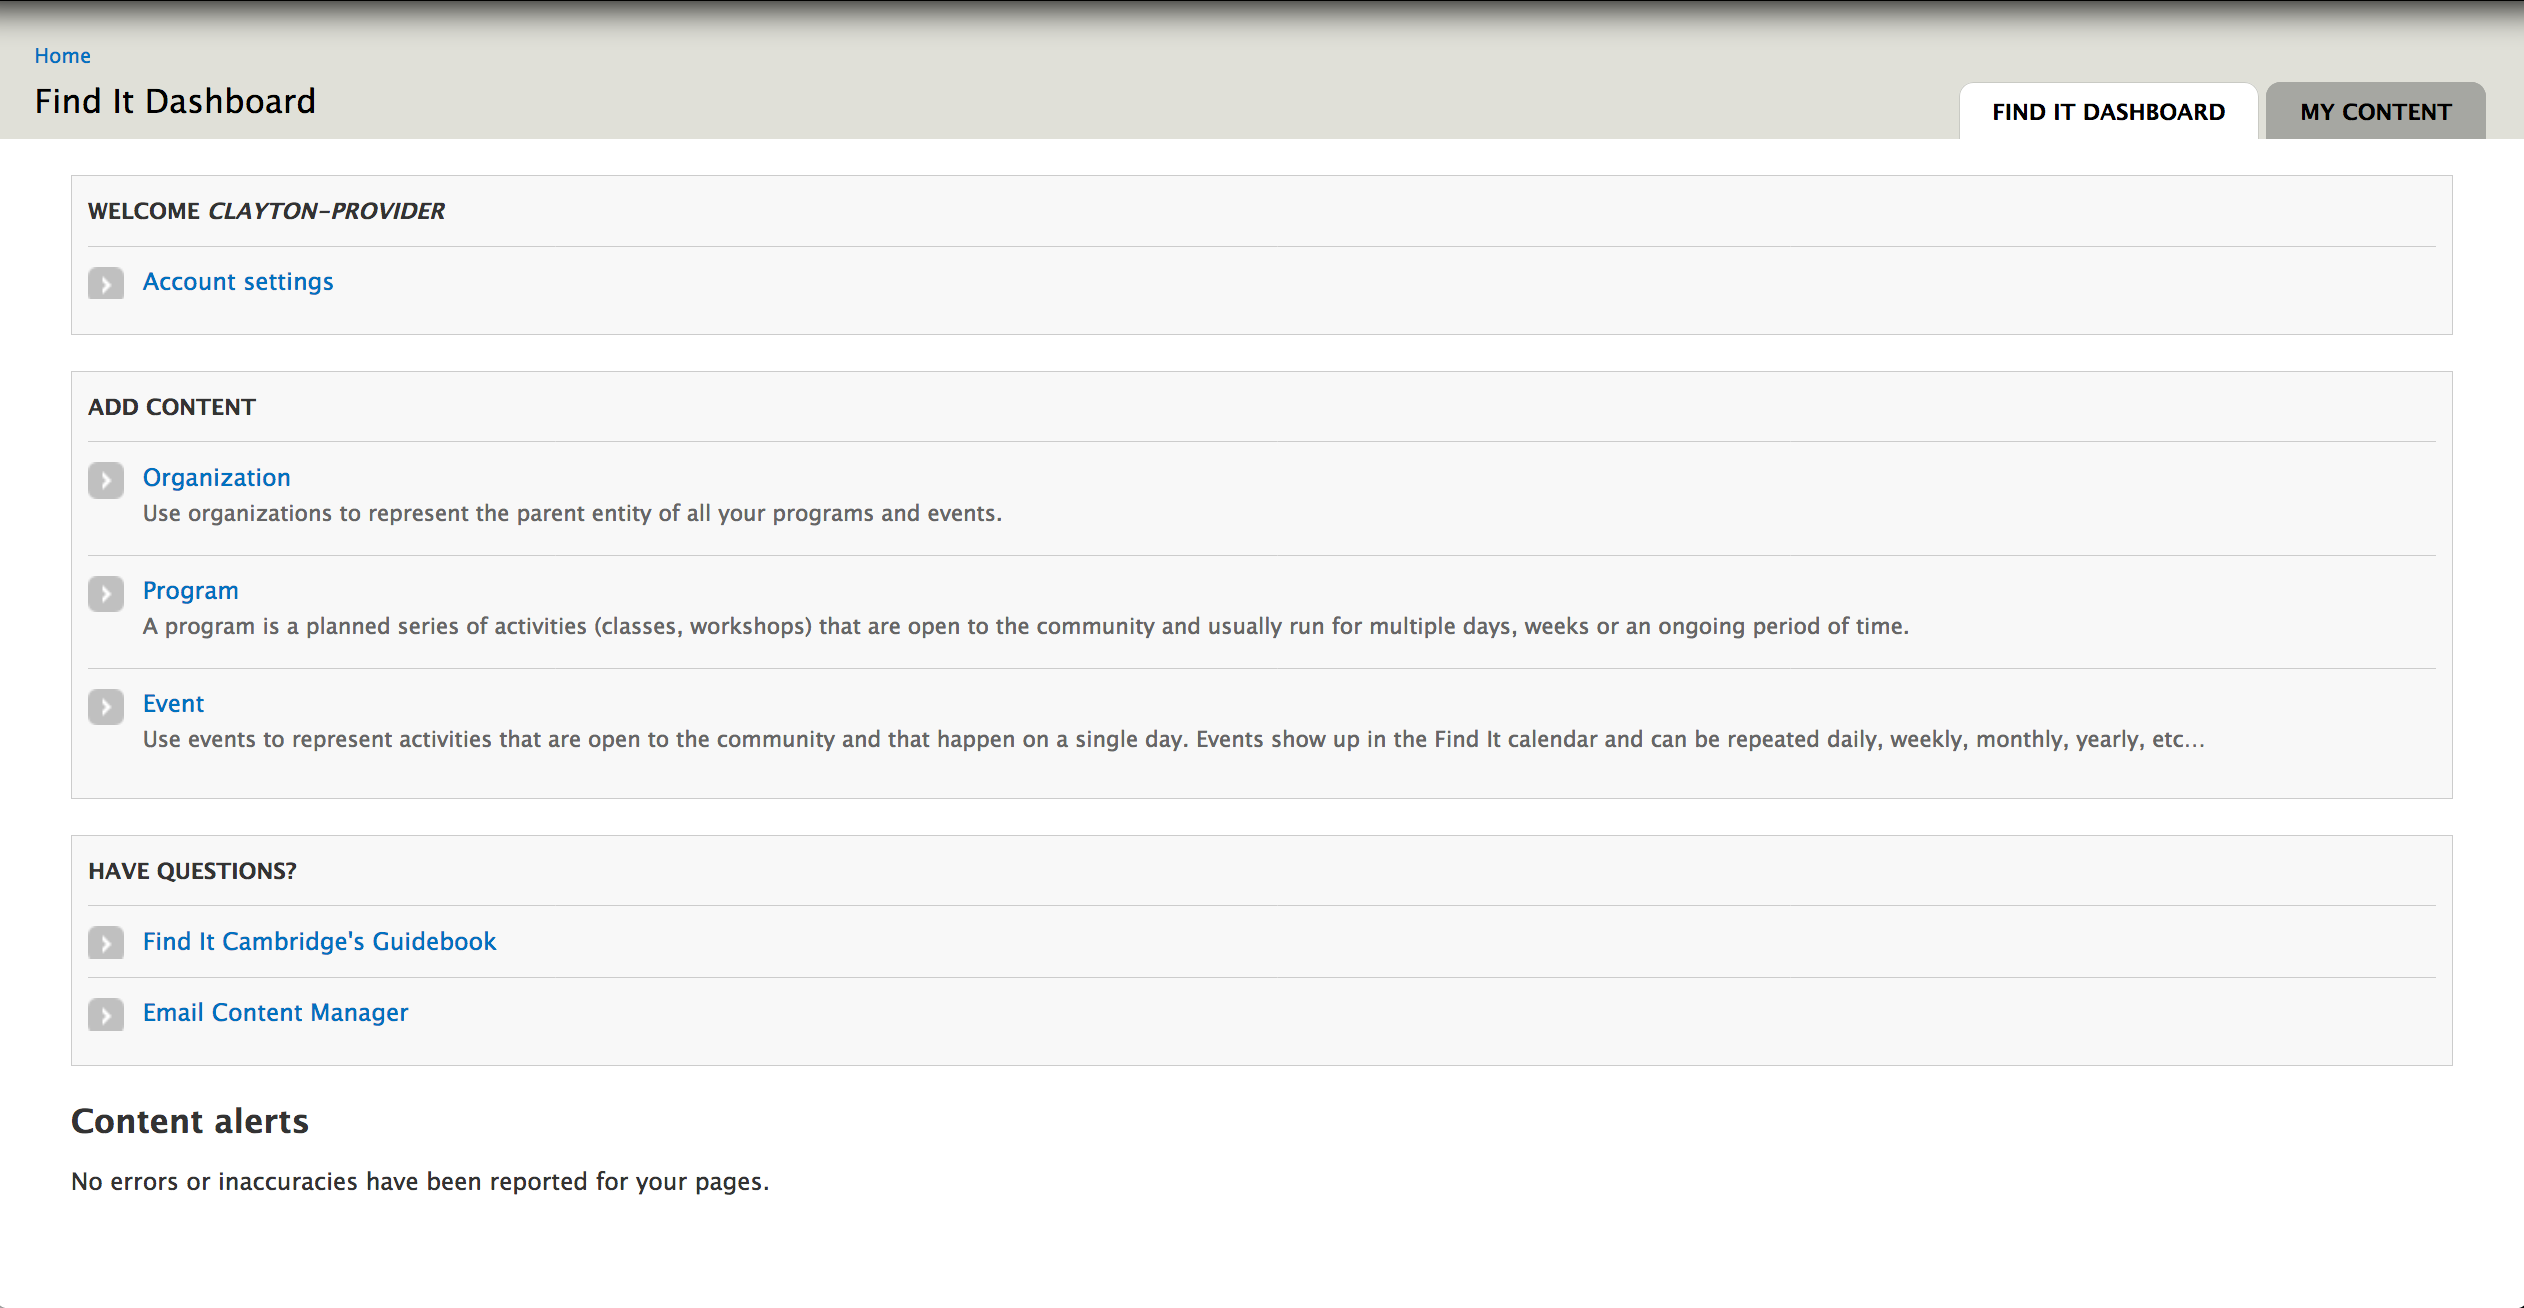 A customized dashboard provides quick access to the most common tasks and information for service providers.
While there is a Drupal Dashboard module, we opted to build this ourselves for maximum flexibility and control. Doing so allowed us to break information out into several working tabs. A custom administrative page for internal documentation pages and other Find It Cambridge information turns control over the “Have Questions?” section of the dashboard over to site administrators, rather than being hardcoded.
Delete Without Worries
With dozens of service providers managing content on the site mistakes are bound to happen. The worst scenario is accidentally deleting a node. In Drupal when a node is deleted it is gone forever. To protect against these we used the Killfile module to “soft delete” nodes, allowing for their recovery if needed.
Helping Managers Help Providers
Another key piece to getting relevant, timely information added to the site is helping the Find It Cambridge team remind and support service providers to use the site and update their information. To that end we put together a statistics page listing organizations in alphabetical order, along with the number of programs and events they have. This allows the team to quickly spot duplicate entries and other incorrect data.
We also implemented a notification system. Any time a service provider adds or updates content the Find It team receives an email. This helps managers stay on top of the ever changing content of the site.
Results
Since Find It Cambridge launched, 333 organizations have created accounts and contributed to the directory. Residents now have a single site they can refer to stay connected with events and access programs. The effort has also fostered increased collaboration across city departments and services.
Connecting community is an ongoing process and we continue to improve the site to better connect residents.
In 2020, we completely overhauled the site and built the program locator and event finder that powers FindItCambridge as software and as a platform available to all cities, towns, and regions to adopt.